2CV ride height adjustment

To set the ride height on a 2CV you really need two things: a flat and level surface and a 9-22mm tie rod adapter. When changing the chassis we had the former but not the latter and when I subsequently acquired the latter I didn’t have the former. Now I have both…

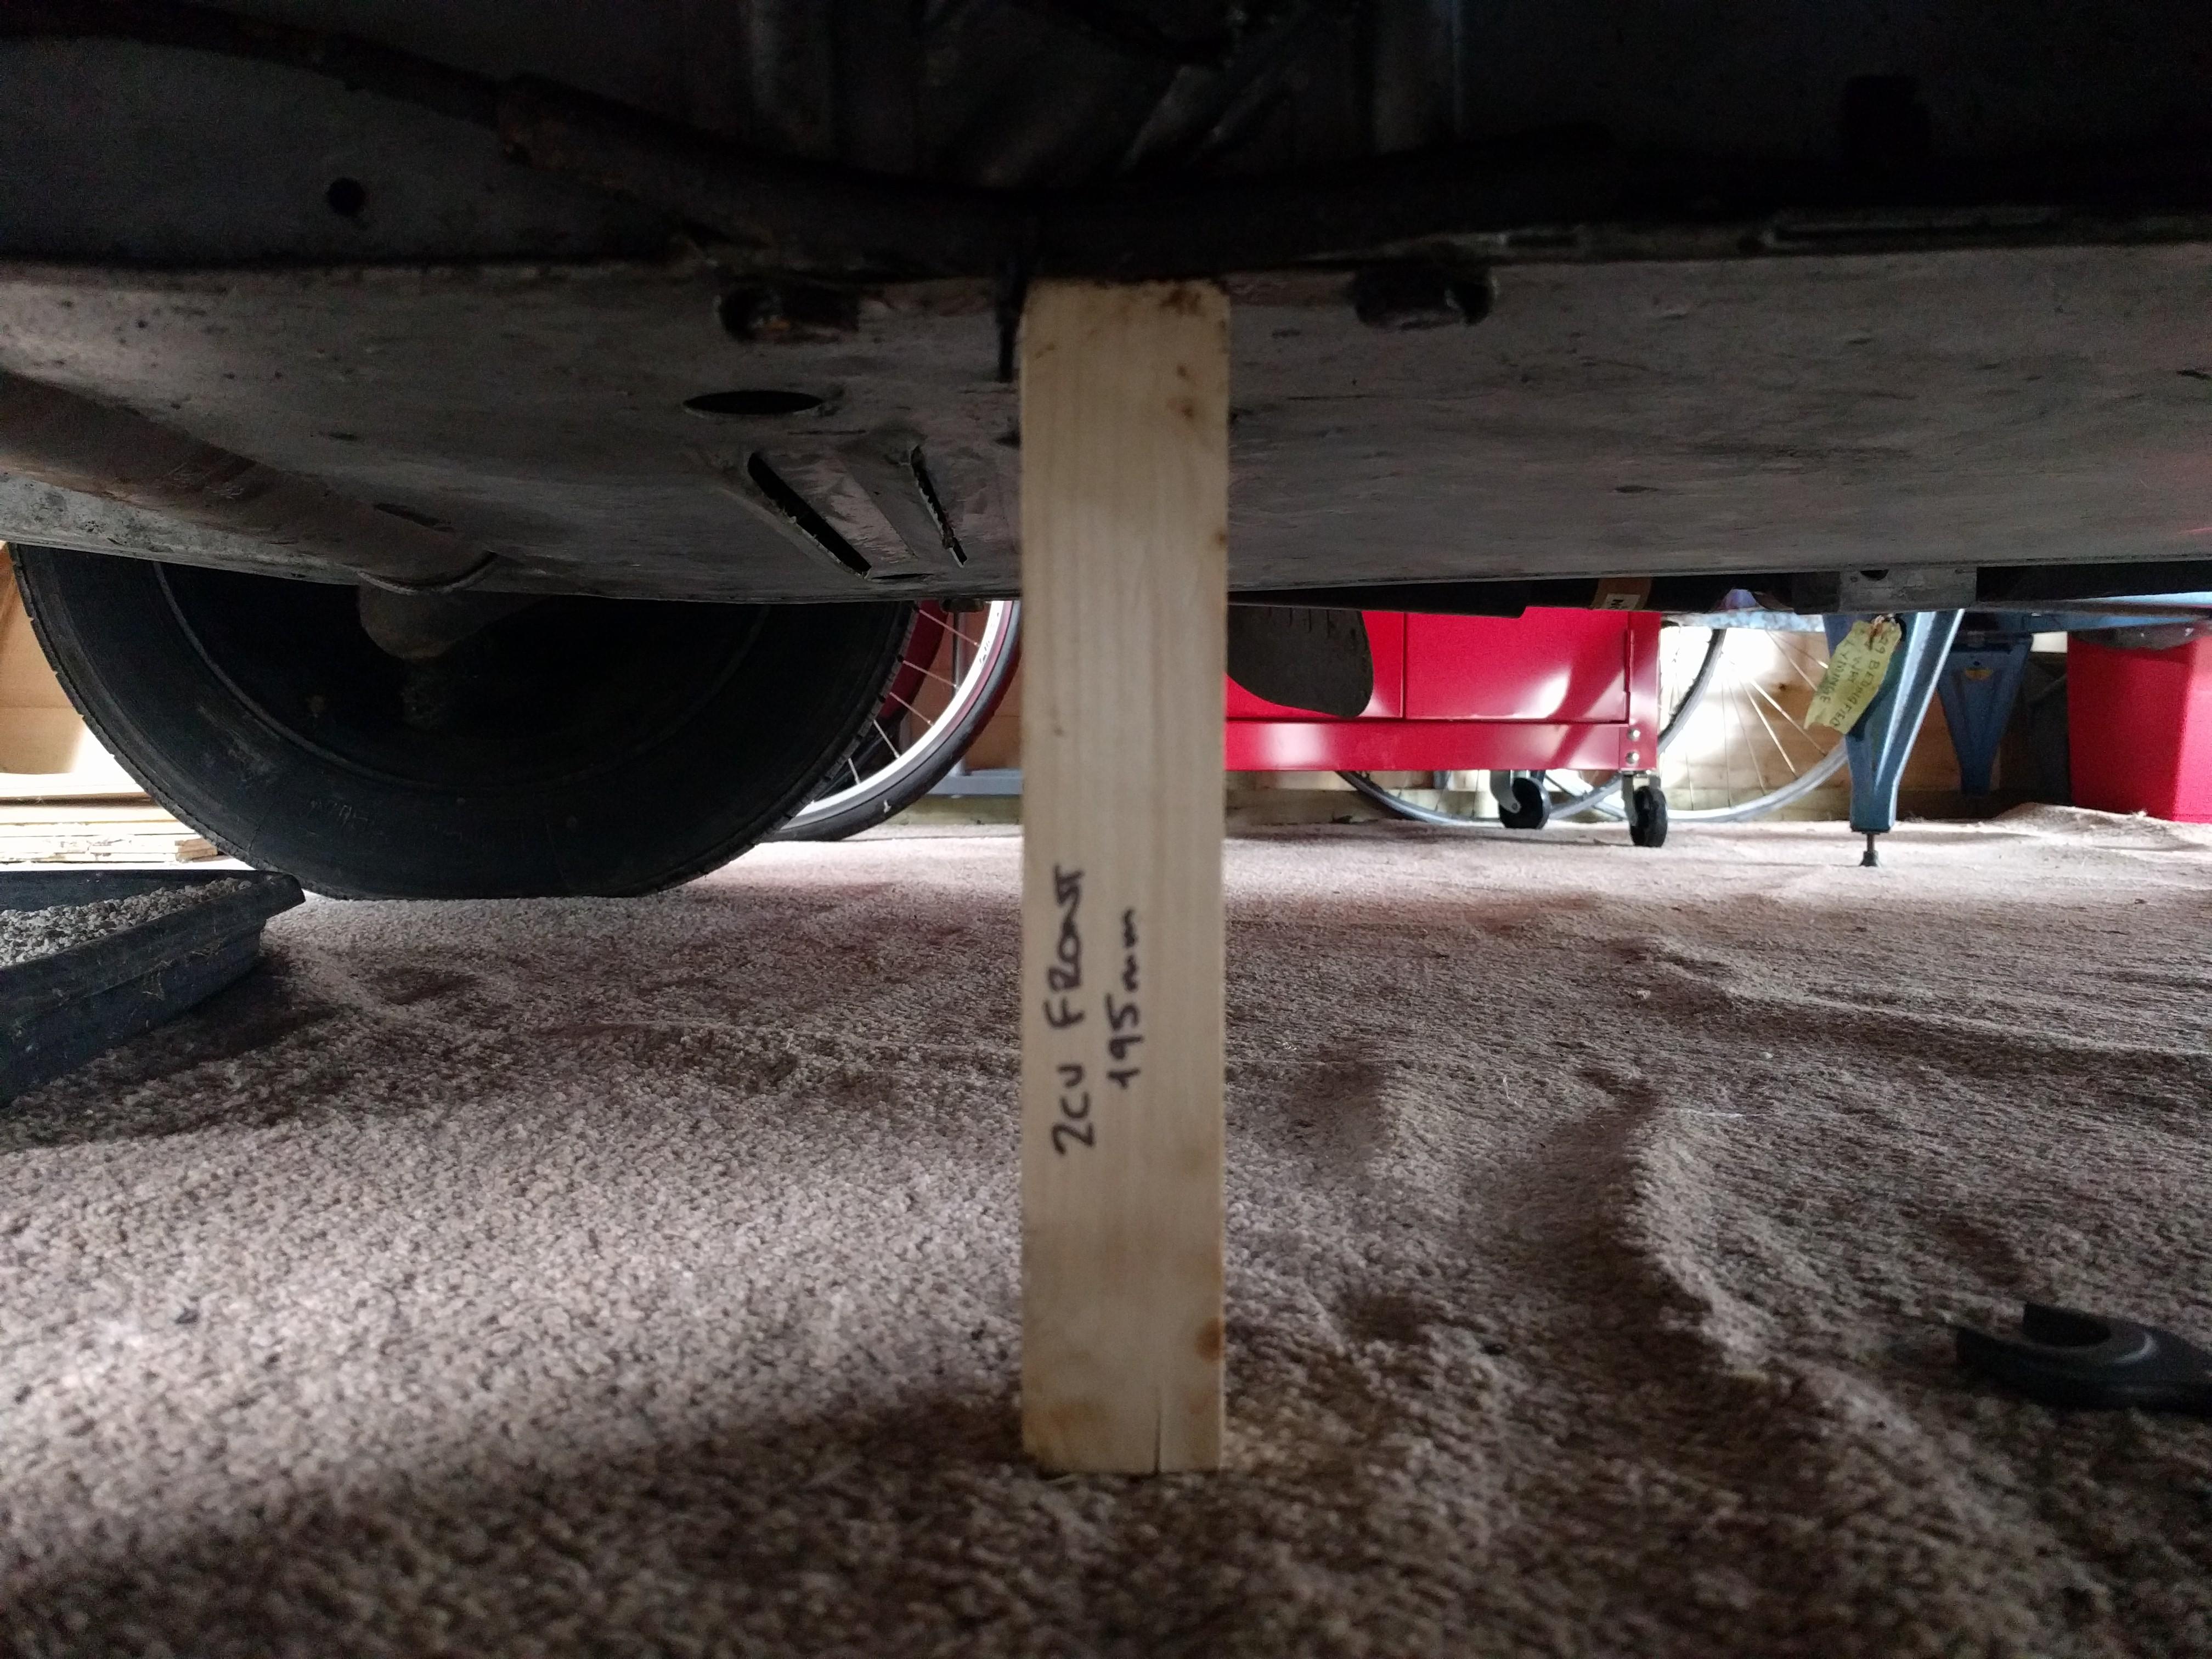
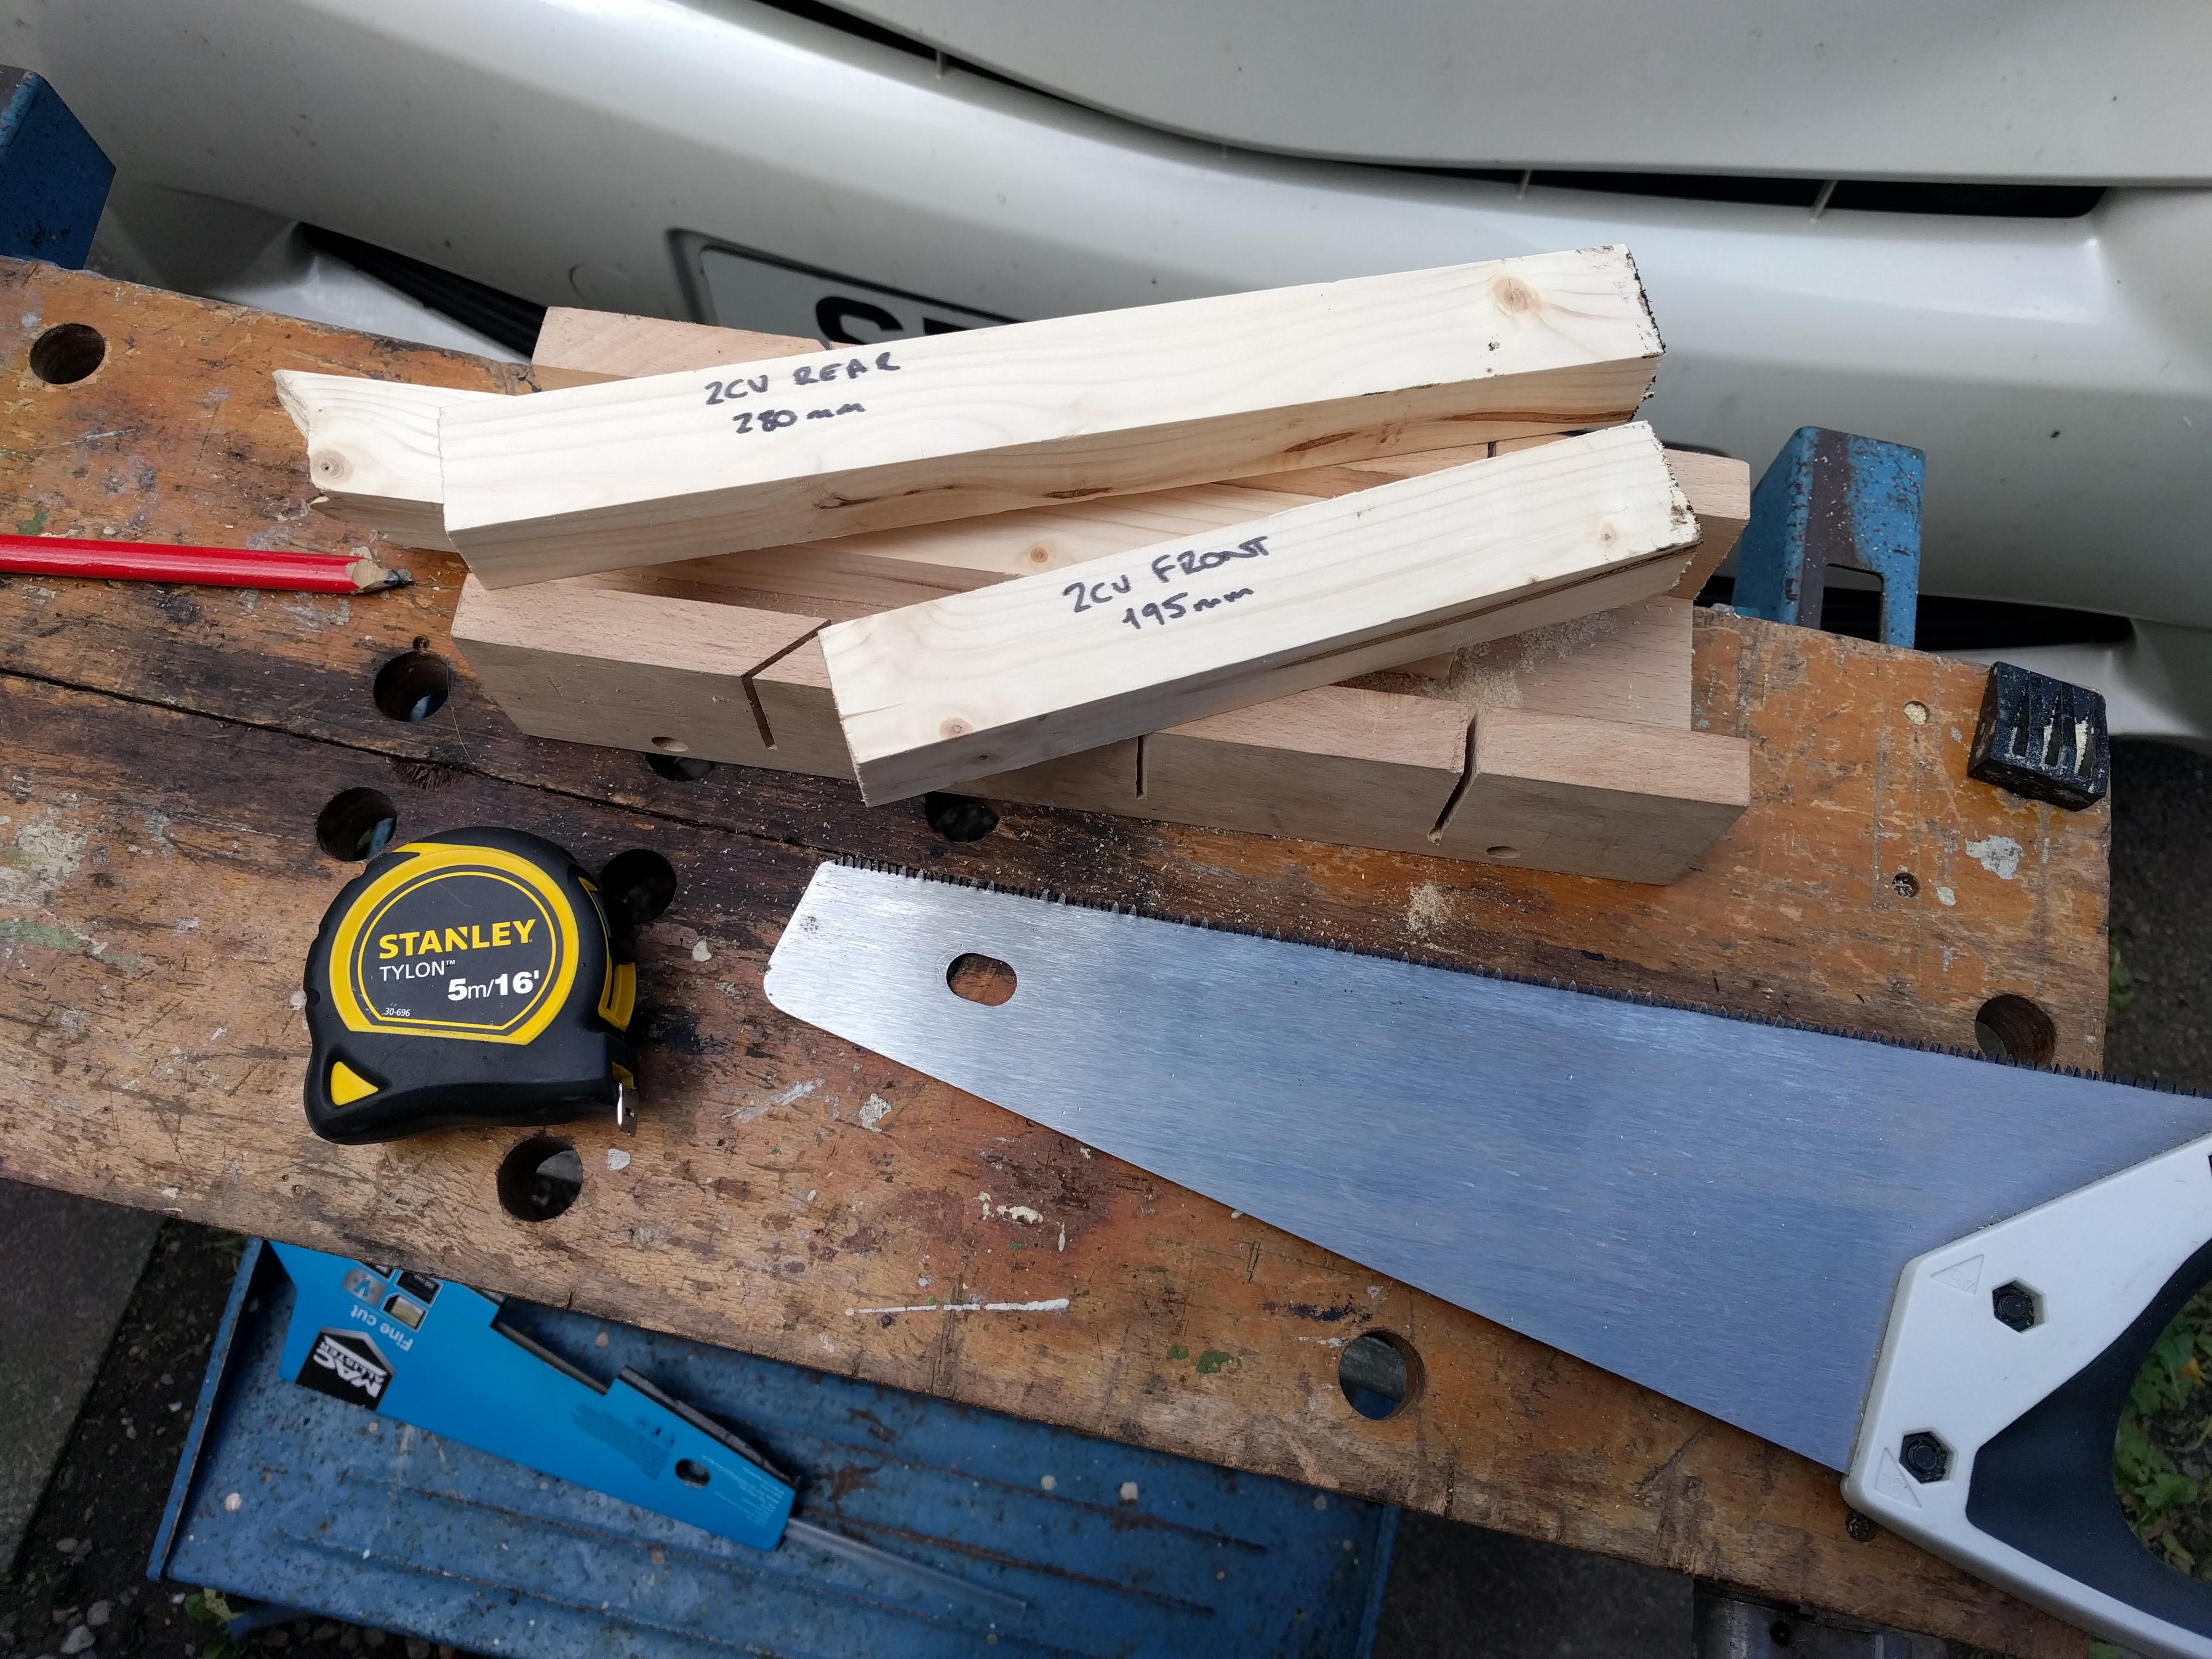
To make measurement easier I cut two bits of wood to the lengths of the required chassis height as measured between the axle bolts, 195mm at the front and 280mm at the rear (±2.5mm).

Cutting bits of wood for 2CV ride height measurement

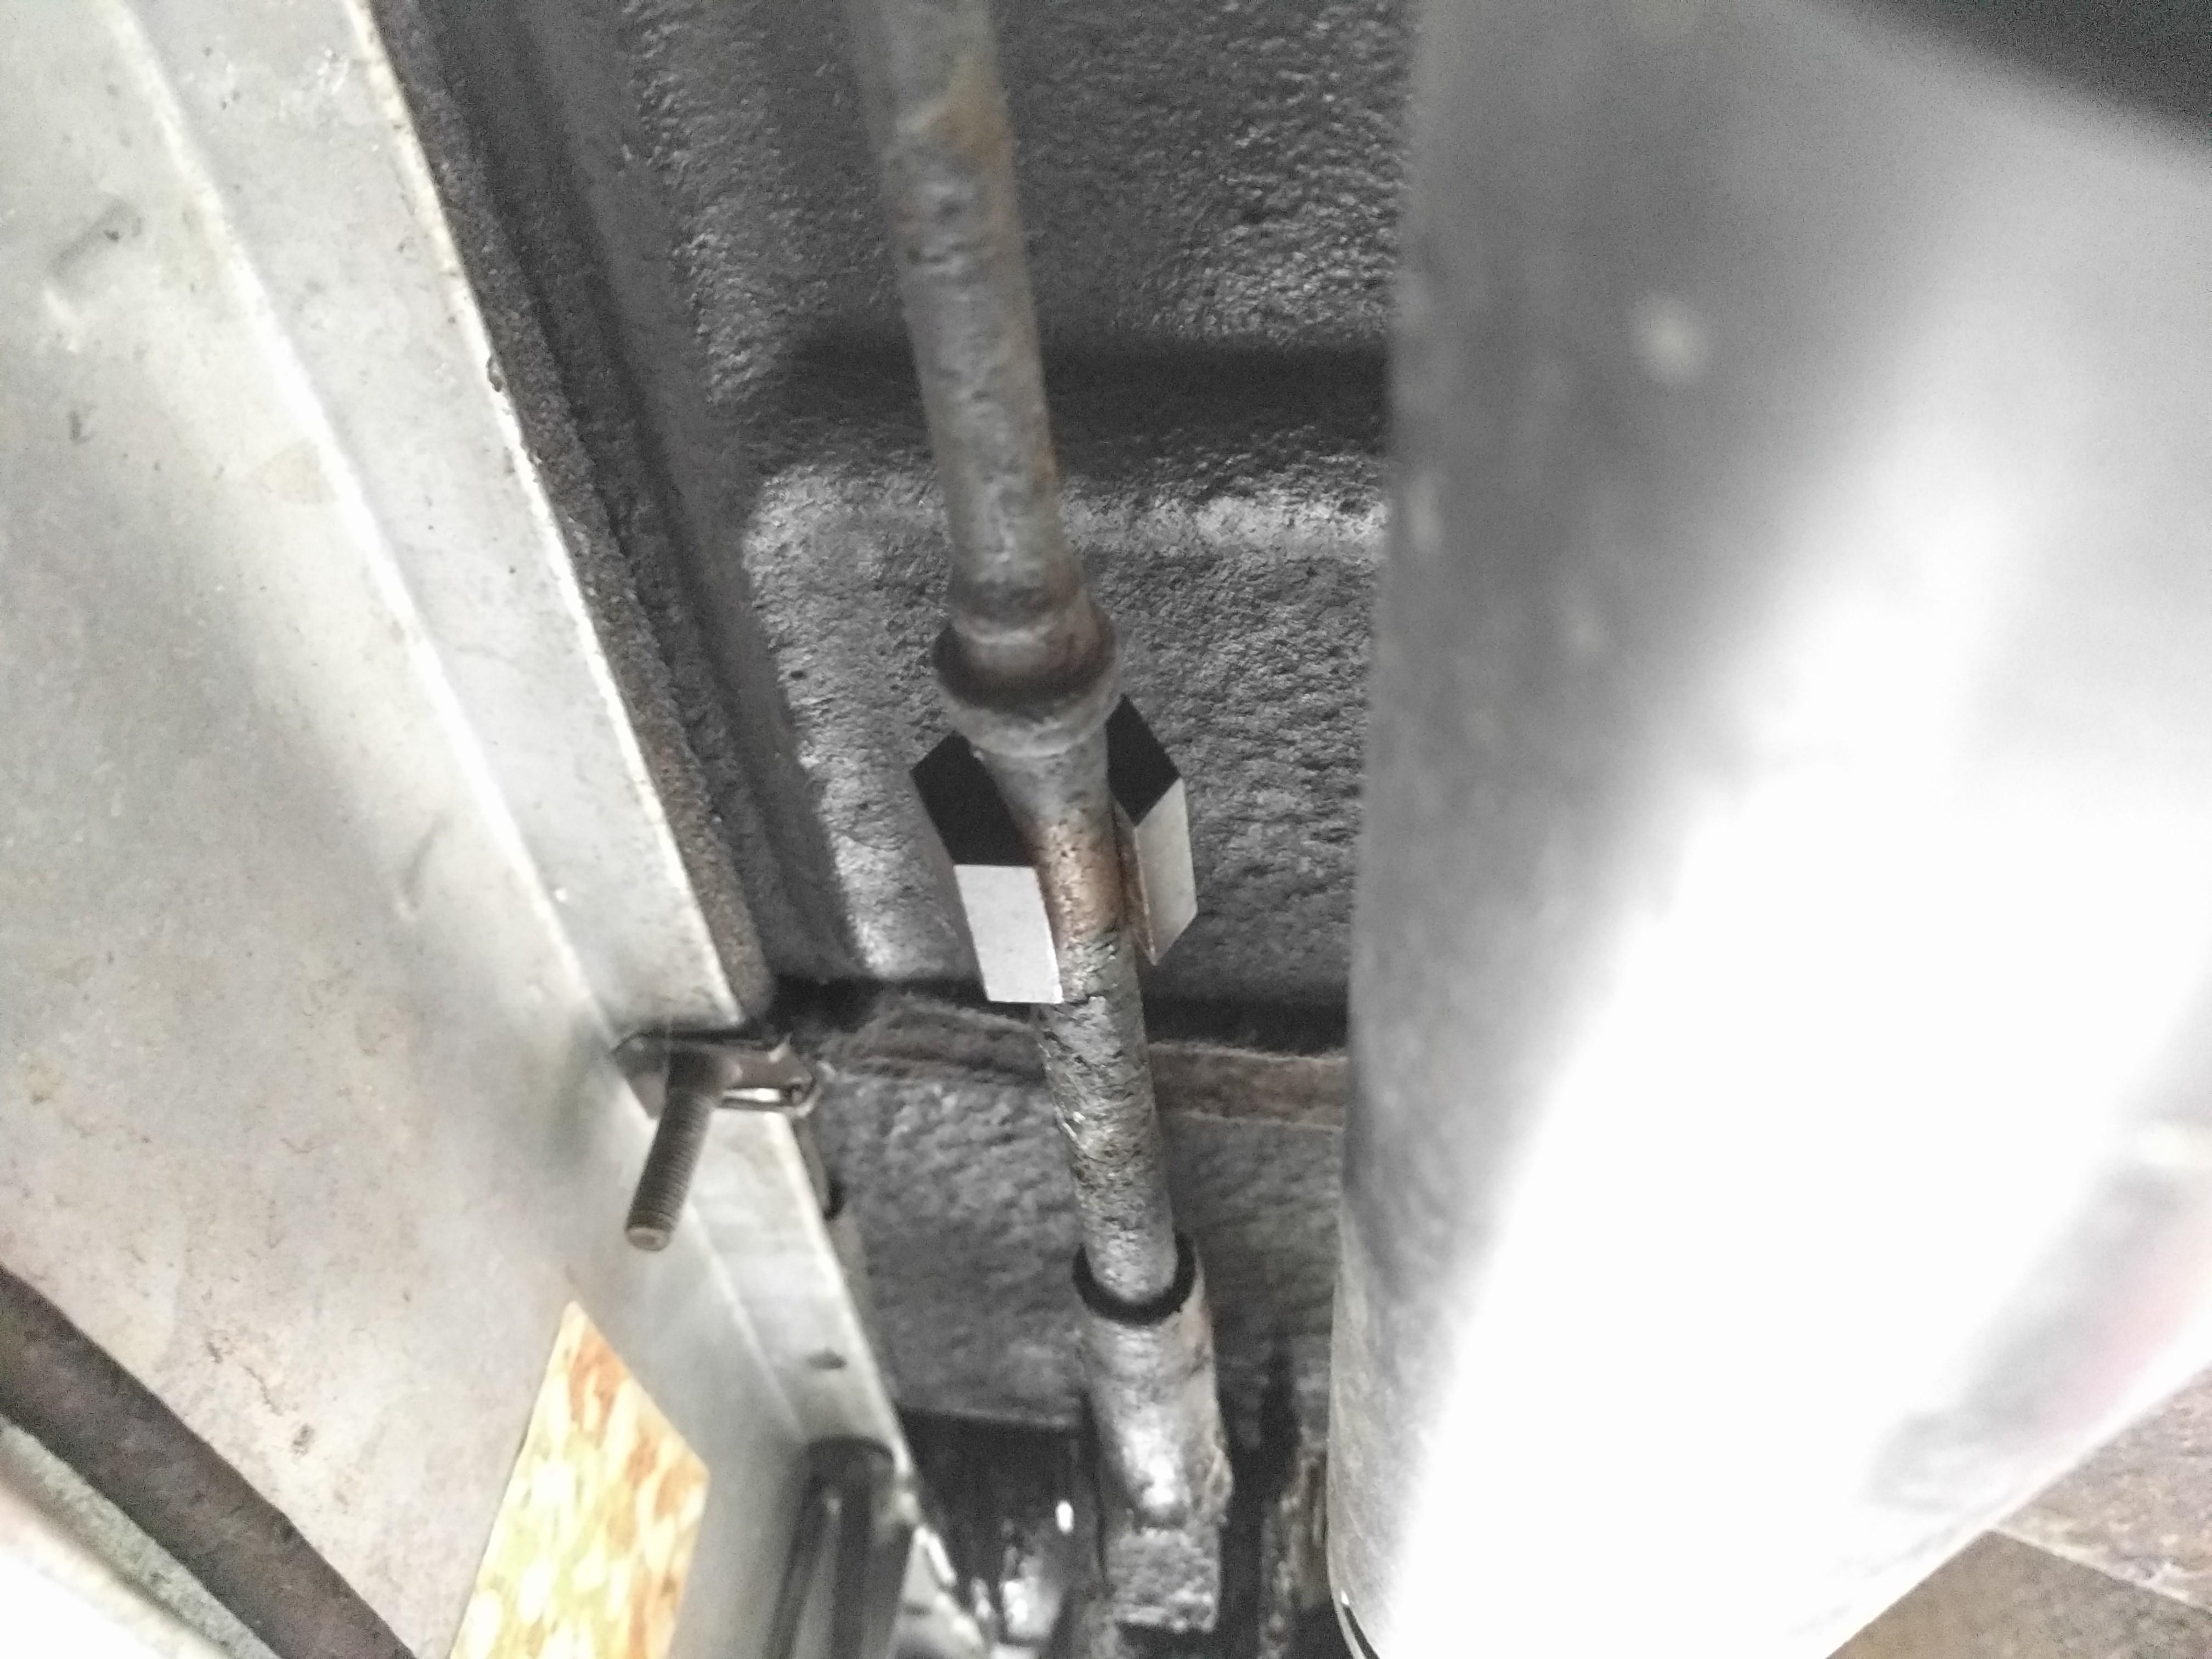
To adjust the ride height the tie rods need to be screwed into, or out of, the eyes that connect to the suspension arms via the knife edges. To facilitate this, the tie rods have 9mm flats on them. Whilst you can use a 9mm spanner you need the shock absorbers off in order to address the flat – which is what we did when we were putting it back together after changing the chassis. The right tool for the job is a 22m hex that has a 9mm slot cut in it.

2CV tie rod 9-22mm adaptor

Whilst access to the tie rods is still a bit restricted, with the adapter on the tie rods the 22m spanner can address it in 12 possible ways which, whilst a bit fiddly, is adequate for the job.

2CV tie rod adapter on a tie rod

Ensure the tire pressures are correct and the car is unladen (except 5l of fuel if you’re being precise). Using the appropriate wooden measuring stick you can see how far off the ride height is. Then, with one side of the car jacked up to take the weight off the suspension and hence the tie rods, you can screw the tie rods in to raise the car or out to lower the car – a rule of thumb is one turn of the tie rods is about 5mm. After making an adjustment, let the car sit back down on the suspension, give it a bounce to settle it, and re-measure. Then, if needed, jack up and re-adjust. As I needed to raise Judith I put a bit of WD40 on the tie rods where they entered the eyes as that made them a bit easier to turn.

When you’re done the wooden sticks should just fit under the chassis between the axle bolts.

2CV front ride hight measurement
2CV rear ride hight measurement

Sheriff Muir Atlantic Wall test site

On Sheriff Muir a few miles North East of Dunblaine there is a section of reinforced concrete wall in the middle of the moorland visible from the road.

Sheriff Muir Atlantic Wall

It was built to emulate a sea wall with a characteristic overhang on the road or “seaward” side and an anti-tank ditch at the base.  The front face is pockmarked with numerous impact craters characteristic of shell fire.  Significant sections have the facing completely broken away down to the thinner (1/2″) reinforcing rods.  Larger (1″) reinforcing rods from the core are also visible in places.

The Northern end of the wall is three meters thick but at the Southern end it steps down to a final width of about one meter.  I assume these different thicknesses were to assess the effect of shell fire on different thicknesses of concrete found on sea walls.

Sheriff Muir Atlantic Wall showing different thicknesses

In the three meter section there are several significant partial breaches in the structure, probably as a result of demolitions charges – possibly from the Churchill AVRE 290mm petard mortar with it’s “flying dustbin” 12kg demolition charge.  These breaches are adequate for infantry to be able to cross the obstacle.

Sheriff Muir Atlantic wall showing breaching attempts

The northernmost of these is a full breach of the wall that’s 4m wide – enough for a Churchill or Sherman to pass through.

On the “landward” side there are large pieces of concrete that have been deposited some distance back from the wall which suggests a significant quantity of explosives were employed.

Being a relatively short section of wall, and with the various thicknesses, it’s unlikely this was used for troop training.  The most likely explanation seems to be that this was used for testing the effects of different artillery shells and engineering equipment on a section of sea wall similar to that found at the landing beaches.

Several hundred meters to the South there is a blockhouse which I went back to explore later.