Storage box

Storage is a key part of the usability of any wargaming setup – it has to be easy otherwise I’m not going to make much use of it.  For the 1:300 aircraft I have used closed cell foam floor mats stuck to card backing and stacked in a plastic storage box.

The foam was first cut to size so that it fitted into the box and then the individual aircraft shapes were cut out.  A sharp knife is needed and I made a paper template for each aircraft type as tracing round the actual models would inevitably lead to damage.

Once the aircraft shapes were cut out, and trimmed where necessary to get a good fit, the foam was glued to a cardboard backing with PVA glue.  After leaving them to set under a decent weight the card was trimmed to the edges of the foam.

1:300 aircraft storage trays

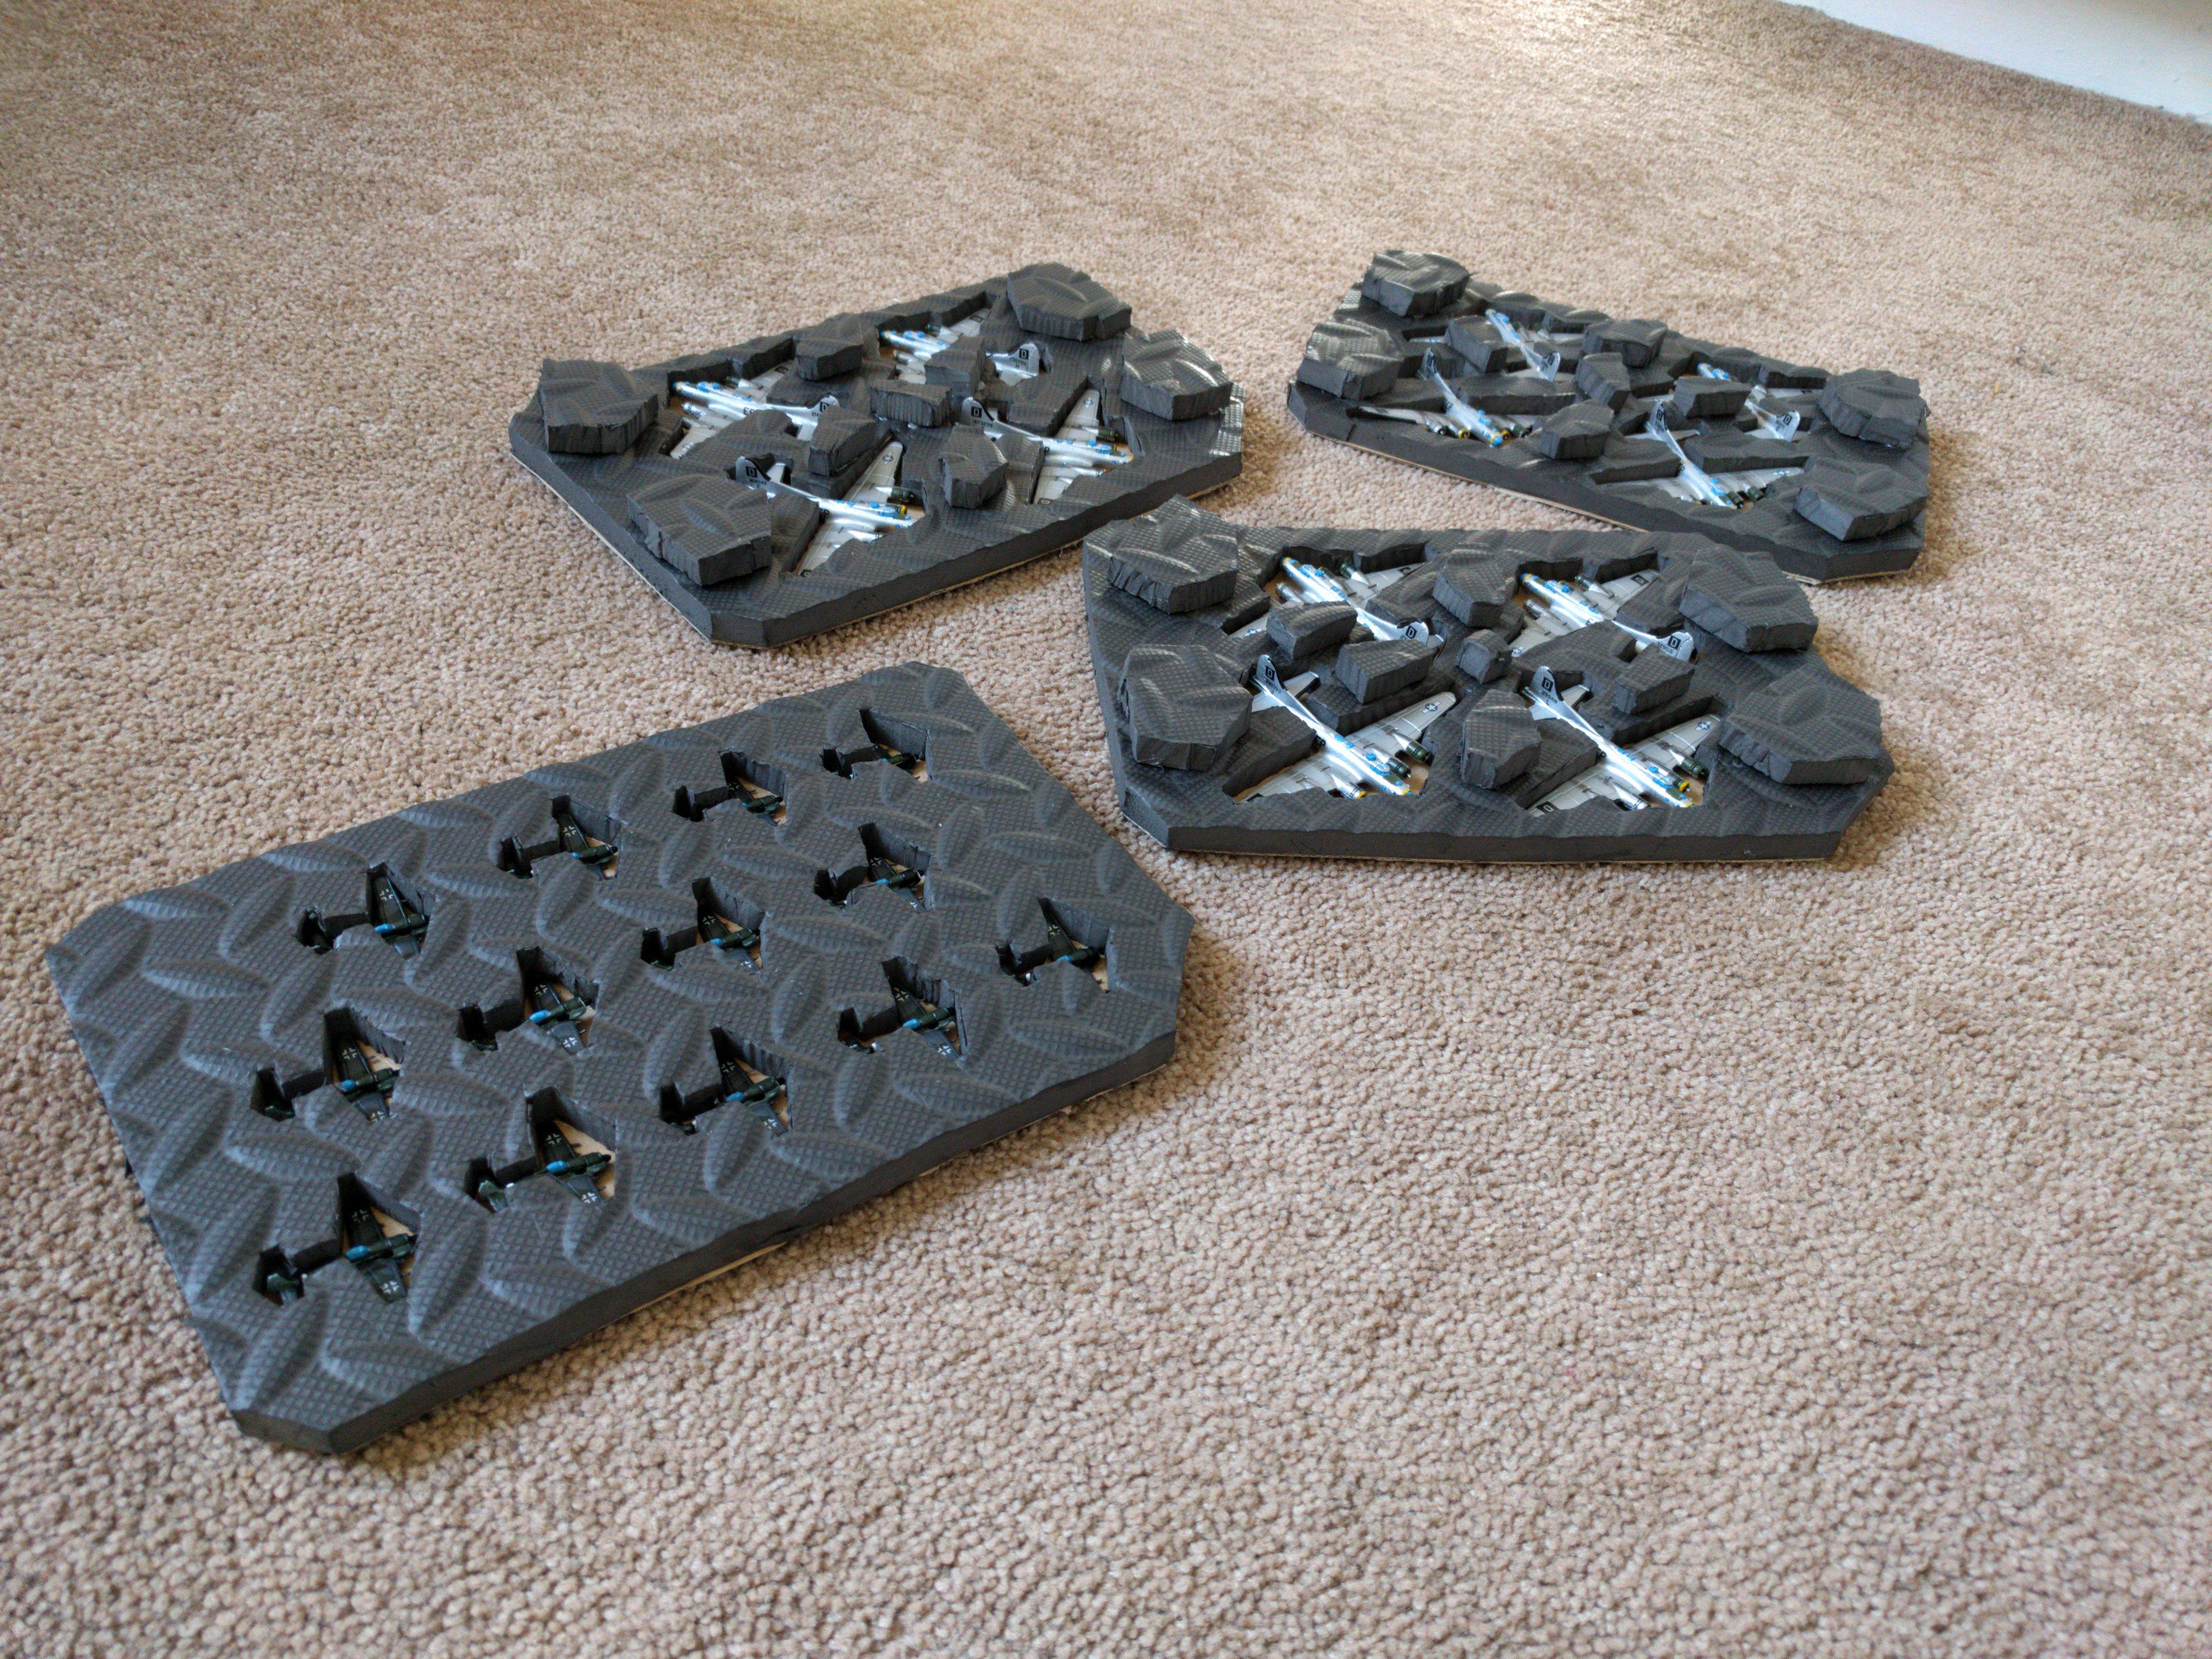
Whilst the FW 190s fitted nicely in the foam layer the B-17s have a high tail.  To get round this pieces of the foam I’d cut out of the aircraft holes were secured on top with a hot glue gun to provide some spacing.  The layers on top won’t be that heavy so the slight compressibility of the foam isn’t an issue.

B-17s in storage tray
Storage trays stacked in box

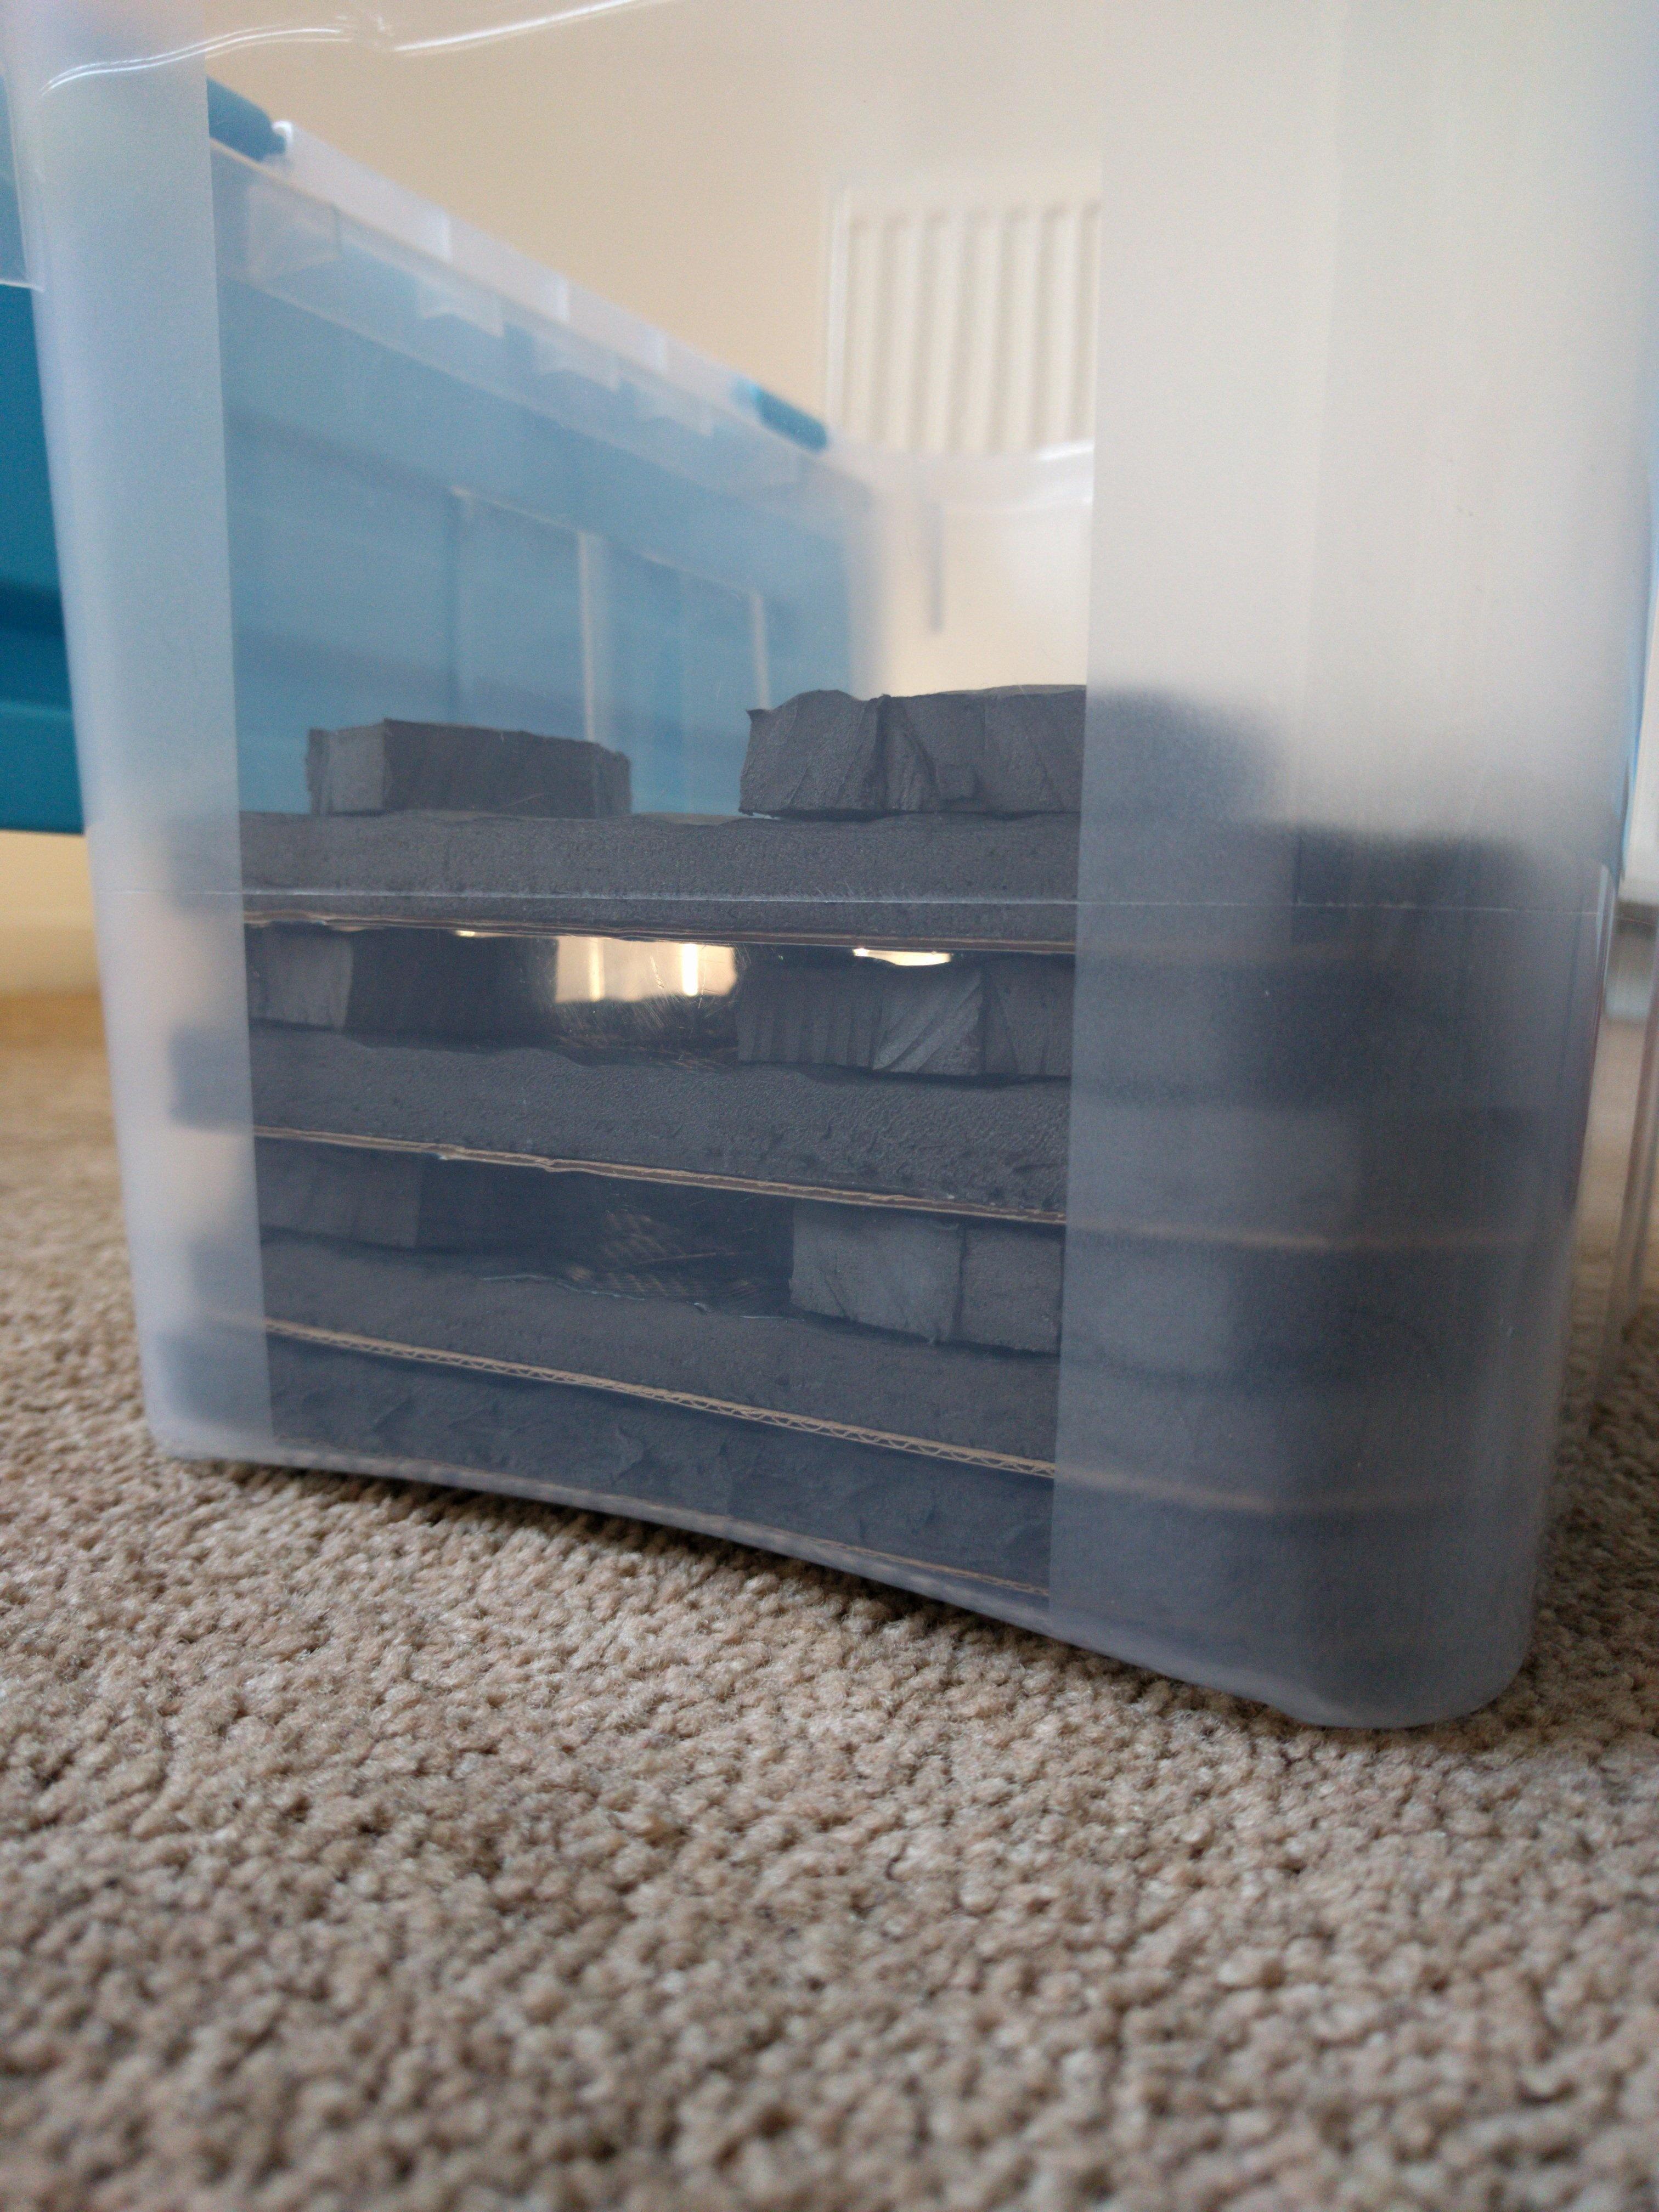
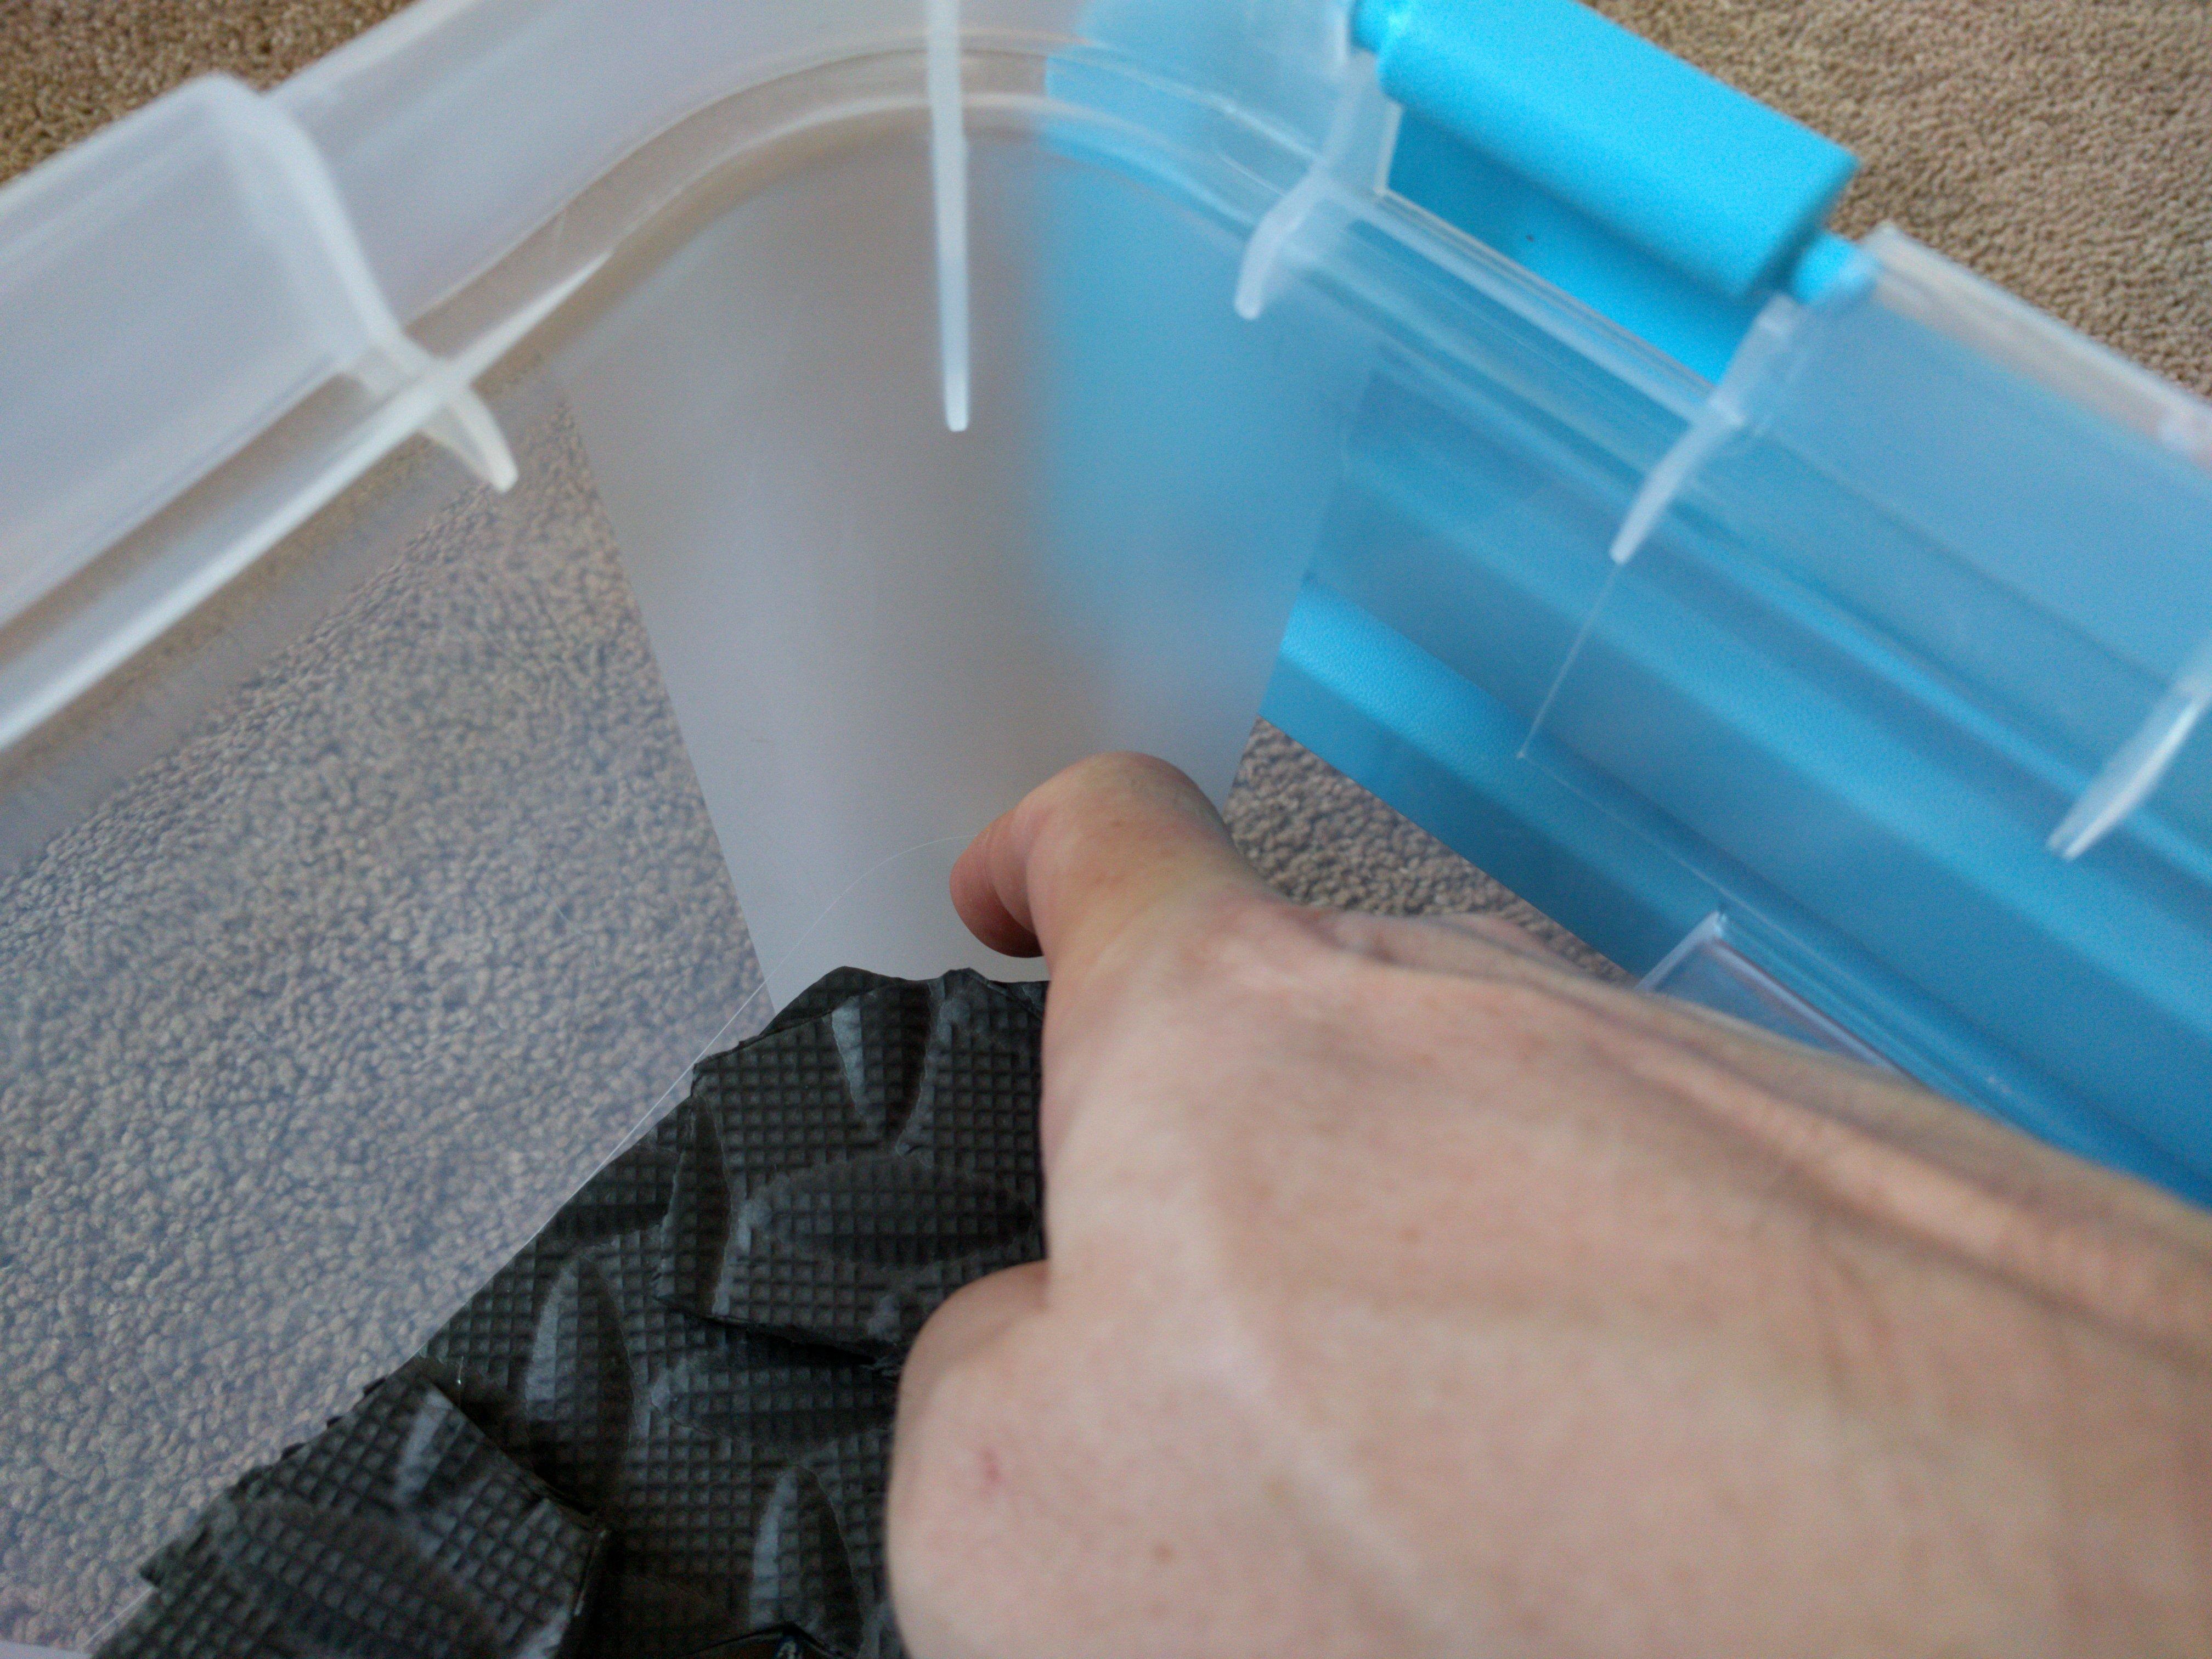
To make getting the layers out of the box easier one corner has been cut out to allow a finger to hook under a layer.

Corner cutout of storage trays


Russian gherkins

This is a brine only recipe for pickling gherkins and it will ferment so don’t keep it in closed jars.

See also: Pickling vegetables

This is based on 1kg of gherkins.

Pickling brine:

  • 2l water
  • 70g sea salt

Boil the water and dissolve the salt.  Allow it to cool.

Seasoning:

  • 8 cloves of garlic, thinly sliced
  • 1 bunch of fresh dill
  • 4 cloves
  • 1 tablespoon mustard seeds
  • 1 tablespoon coriander seeds
  • 4 tablespoons black peppercorns
  • 3 oak, blackberry or cherry, leafs
  • 2 bay leafs
  • De-seeded red chilli or fresh horseradish (optional)

Wash the gherkins and top and tail them.

Put the dill in the bottom of the jar and pack one layer of the gherkins in vertically.

Cover the first layer of gherkins with brine.

Add the seasoning on top of the gherkins and then pack the rest of the gherkins in.

Fill to the top with brine and weigh the gherkins down with a saucer.  Cover with a cloth and store them so the air can circulate underneath the jar.  It’s normal for white foam to appear on the top of the liquid.

They are ready to eat after two days.

Russian brine pickled gherkins


Pickling vegetables

Generic recipe for pickling vegetables, serves as a suitable basis for pickling most things and can be scaled up and adapted to taste.  Good for gherkins, courgettes, peppers and more.

See also: Russian gherkins

Pickling liquid proportions:

  • 1l water
  • 180ml 10% white, pickling, vinegar
  • 5 teaspoons salt
  • 7 teaspoons sugar

Boil the pickling liquid and dissolve the salt and sugar.

Prepare the vegetables:

  • Courgettes: peel them and remove the seeds.
  • Gherkins: top and tail them.
  • Carrots: thickly slice them.
  • Peppers: remove the seeds and chop them into quarters.

Pack the vegetables in the jar as tightly as possible – this helps to stop them floating too much.

Add bay leafs, peppercorns, coriander seeds, mustard seeds, dill and any other seasoning you like.  Pro-tip: put the seasoning in between two layers of vegetables to make sure it stays fully immersed in the liquid.

Cover the vegetables with onion slices to above the top of the jar.  When the lid is closed they will hold the vegetables down in the liquid as they try to float.

Pour the pickling liquid over the vegetables whilst it’s still boiling.  Fill the jar until it starts to overflow and close the lid.

Leave them for at least three days, although longer is obviously better.

Gherkins after bottling

Liked on YouTube: Dating Armor from Effigies: Be Careful!

Dating Armor from Effigies: Be Careful! Sometimes effigies can play a trick on you. For the most part effigies are carved within a few years of either side of the death of the individual they represent, but in some cases there exists a significant disparity from the date of death and date of manufacture which can cause confusion when trying to date the armor.

Support the Channel – http://www.patreon.com/KnyghtErrant Facebook – http://www.facebook.com/KnyghtErrant Pinterest – http://www.pinterest.com/KnyghtErrant Website – http://knyghterrant.com via YouTube


Specialist tool

I was doing a bit of tidying up work on the fuel tank which involves inserting some bolts vertically upwards.  The problem with this – as I learned before – is that, under the influence of gravity, they will drop back into the socket which doesn’t leave enough thread protruding to bite into the nut.

Following the principle of the sump plug socket I put a slice of fuel hose into an 11mm socket.

11mm socket with fuel hose in it

The bolt now sits on top of the fuel hose with the full amount of thread available.

11m socket with fuel hose in it holding up a bolt

Airfix Chieftain Tank

As the Chieftain is my favourite tank – for a variety of subjective and non specific reasons – I thought it was probably time I got round to making a model of it.

As it’s now long out of front line service I couldn’t find anyone making a 1/76 model so I took to fleaBay to pick up the old Airfix Mk 2 Chieftain. This kit was originally released in 1970 and the box art on mine dates it to 1975-1978.

Airfix 1/76 Chieftain box

The crew pictured on the box don’t come with the tank but the hatches do open so I got some Wargames Foundary 20mm British tank crew.  These are WW II but British Army tank crew kit hadn’t changed significantly by the early 1970s so they were fine for my needs.

Wargames Foundary Brittish tank crew

They needed a bit of fettling to fit the Chieftain so after some basic assembly of the hull and turret I got them to a point I was happy with.

Airfix Chieftain with Wargames Foundary crew


Replacing 2CV rear wing retaining screws

Although someone had painted the heads silver, the original rear wing retaining screws were rusty – to the point one had seized fast and had to be cut out when we took the wings off during the rechassis.

Original 2CV rear wing retaining screws

SPOG do replacement stainless screws for these so I picked up a pack.

SPOG and original 2CV rear wing retaining screws compared

As we’d done the hard work when we took the wings off, and had reassembled using copper grease, the old screws came out one at at time to be replaced with a new one.

SPOG 2CV rear wing retaining screws

As the rivnut at the bottom of the offside wing had been seized to the screw and had come out I used a flanged stainless nylock nut for that screw.  (Standard M5 0.8 thread.)