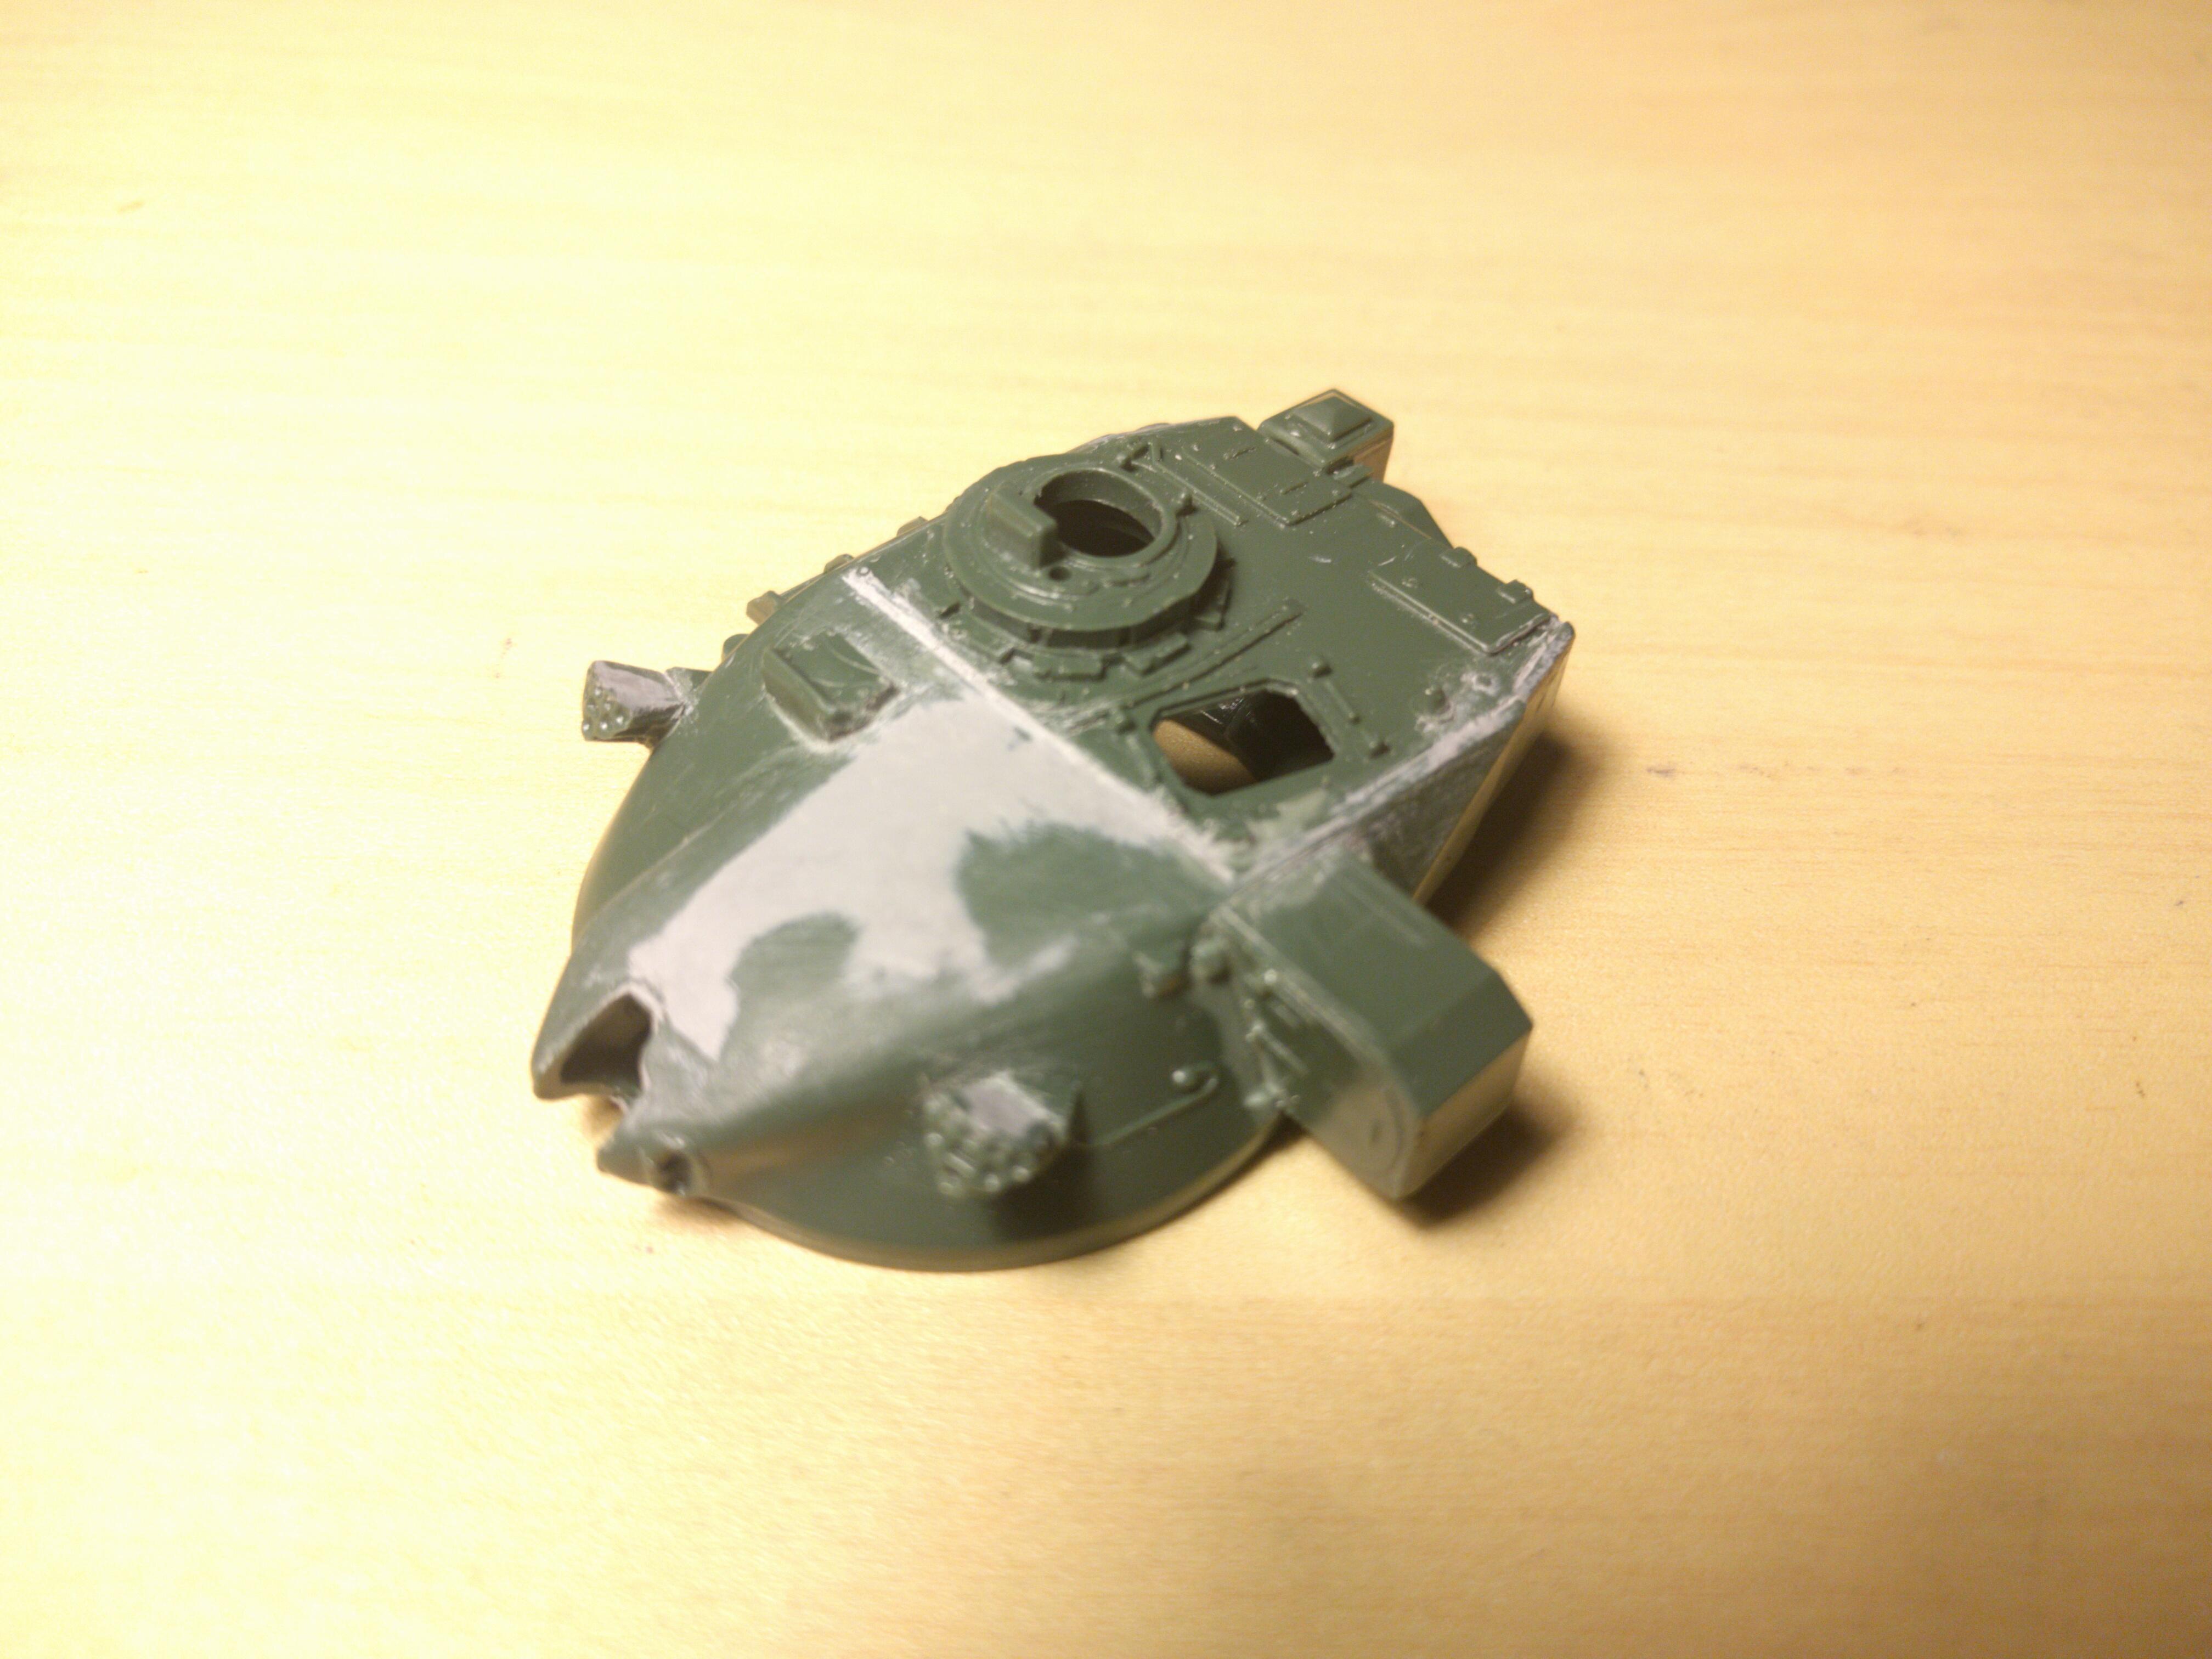
The turret is one of the distinctive visual features on the Chieftain and on the kit I’ve got the front top surface wasn’t particularly good, especially along the join. Quite a few layers of filler followed by smoothing were needed to get a smooth profile.
There were a few other bits of filling required, the tops of the smoke grenade dischargers and the seam round the top plate being the most obvious.
By modern standards this was quite a bit of work for a plastic kit but it’s 40 years old and the tooling is nearly 50 years old so I’m not going to complain, in fact it adds to the satisfaction of making an old kit and having to deal with the problems of a modeller at the time when this was a state-of-the art kit.
On my way down to York in the C1 I pulled into the excellent Mainsgill Farm Shop for some provisions. As I made my way across the car park there was a rattle from the back. A quick visual inspection revealed the cause – the exhaust hanger on the back box had snapped and it was resting on the rear beam.
Whilst it was still attached when I left home, it had presumably managed some distance before I had noticed. It wasn’t dragging, and it wasn’t leaking so I figured it would make it the rest of the way to York.
Before heading home, TomB engineering fashioned me a temporary exhaust hanger that was more than adequate to get me back.
The culprit was pretty easy to identify – the hanger was heavily corroded and the 10 years of vibrations had caused it to neck to breaking point.
The following weekend I took a trip to TMS motor spares to pick up a new back box. Getting the old back box off proved somewhat challenging – first I had to cut off what was left of the old exhaust clamp as the bolts were more rust than metal. Then it came to separating the joint with the centre pipe.
This did not want to budge – despite persuasion with a full tang screwdriver and a mallet. As it had gone bad I had to cut it off.
However, I was expecting this to be a butt joint – as on the 2CV – but, once I’d finished cutting, I realised it had been a socket joint…
So, at this point I knew I was now going to need a new centre section even if I didn’t want to fully admit it to myself yet – especially given it was now Saturday afternoon meaning I wouldn’t be able to get a new pipe until Monday morning.
Still, I could still remove the old centre section in preparation. Fortunately the two spring loaded bolts that went into the cat exit flange weren’t too badly corroded and were only a two swear rating to free up. Being the same age as the rear section, the centre section was, unsurprisingly, similarly heavy with surface rust even if it wasn’t holed.
However, once it was off the car and I could have a good look at it I found that the front exhaust hanger was in much the same state as the rear – heavily necked and not far off failing.
So it turned out to be fortunate that I’d cut through the wrong bit as it now meant that I was going to be replacing it before it failed and whilst I had everything apart anyway. If it had failed in a few weeks time and I’d had to spend another weekend under the car swearing at the exhaust I would have blamed past me for not having done the job right in the first place.
There was still one major obstacle to overcome – getting the oxygen sensor out.
The Book of Lies™ says “The oxygen sensors are delicate and may not work if dropped or knocked, if the power supply is disrupted, or if any cleaning materials are used on them.” I translated that to mean: “Dose it in penetrating fluid, apply blow torch until cherry red, clamp with mole grips and beat with a hammer.”
The only alteration I made to that was to substitute the mole grips for a correctly sized 22m spanner. With the aid of +2 gloves of power and full application of my not inconsiderable body weight, after a few heat cycles it came free and I went backwards, fortunately my landing was cushioned by my not inconsiderable derrière. A four swear rating for this job.
Reassembly was the reverse of removal – but without a blowtorch and an angle grinder. Joking aside, everything went back together remarkably easily – the only point of note is there’s a gasket made of compressed wire wool in the joint between the cat and the centre section.
With the exhaust fitted and everything tightened up nicely I turned on the engine to check for leaks – all good!
I was concerned that I might have damaged the oxygen sensor when spraying Super Crack Ultra on the cherry red mounting but the ECU seemed happy.
After a short shakedown it was still holding together so I went for a longer run to get everything fully up to temperature – there were some funky hot metal smells which would have been worrying if I hadn’t just replaced the exhaust but everything held up fine.
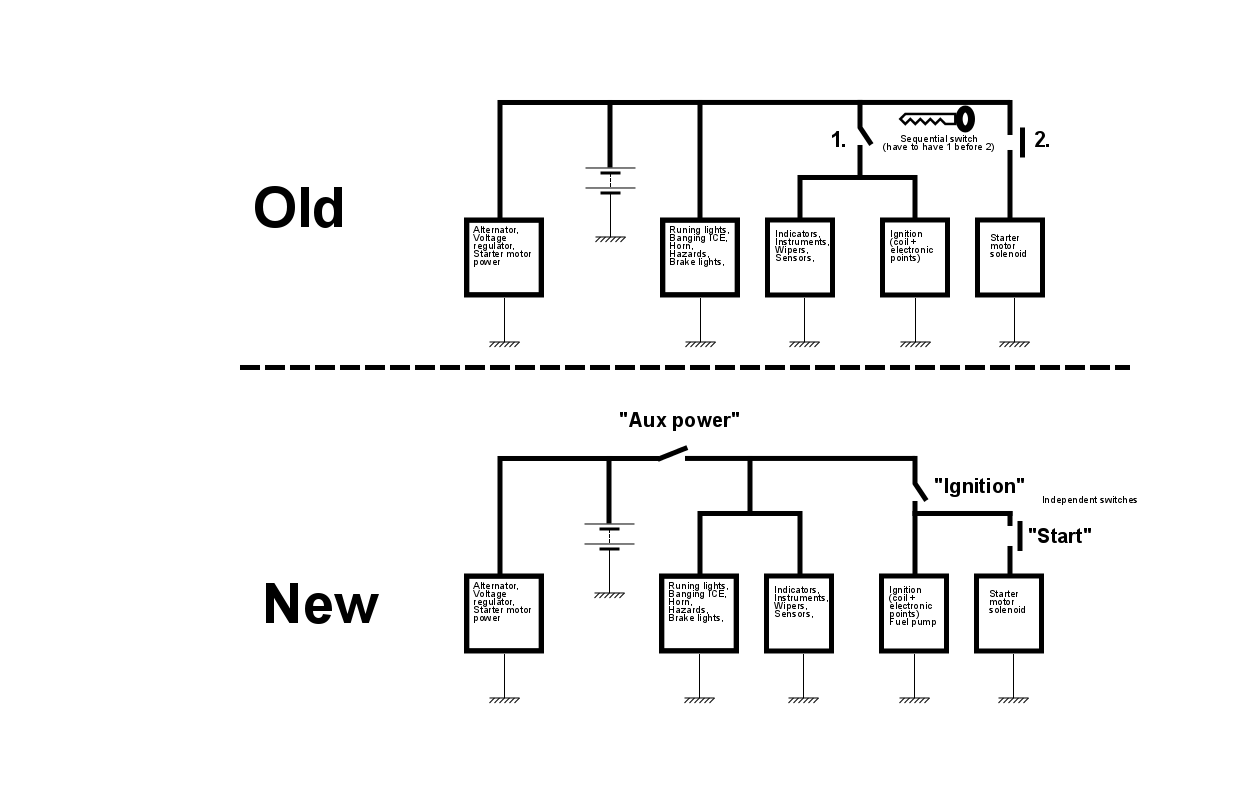
As I want the ignition independently isolated from the accessory electrics I’ve had to split the coil positive off at its join with the accessory circuit and wire it back in switched in series with that circuit.
The original 2CV fuse box uses glass fuses in a plastic case glued to the firewall at the back of the engine. As long as nothing goes wrong with it this works as well as it needs to but it’s not a solution you’d choose to keep if you were changing things.
As I’ve got a bare wiring loom for my Burton project, and I’ve done the hard work of identifying which connector is which, it was a relatively simple – if time consuming – task to replace each of the old glass fuse terminals with a female blade connector and cover them with an appropriately coloured piece of heat shrink. These then fit onto the male blade terminals of a generic after market fuse box.
Whilst there are only five fuses in a standard 2CV fuse box I’ve gone for eight as that gives me room to add fuses for some of the additional circuits I’m going to be adding – notably an electric fuel pump.
Whilst still not objectively easy, having a stripped wiring loom makes it significantly easier to identify which connector is which. To start with I’ll need the ignition and starter circuits so I can run the engine but having five holes in the wiring loom where the fuses are supposed to go makes figuring out what’s what more difficult than needs be.
So, after an evening probing around with a multimeter I’ve now identified both ends of all five fuses and which of those ends match up.
To make my life easier I have numbered them from 1 to 5:
Instruments, indicator, wipers, alternator field (16A)
Stop, interior and hazard lights (16A)
Near side running lights (10A)
Fog light (16A)
Off side running lights (10A)
Next step will to be connect these up to a blade fuse box which will make life significantly easier and allow for fusing additional circuits.
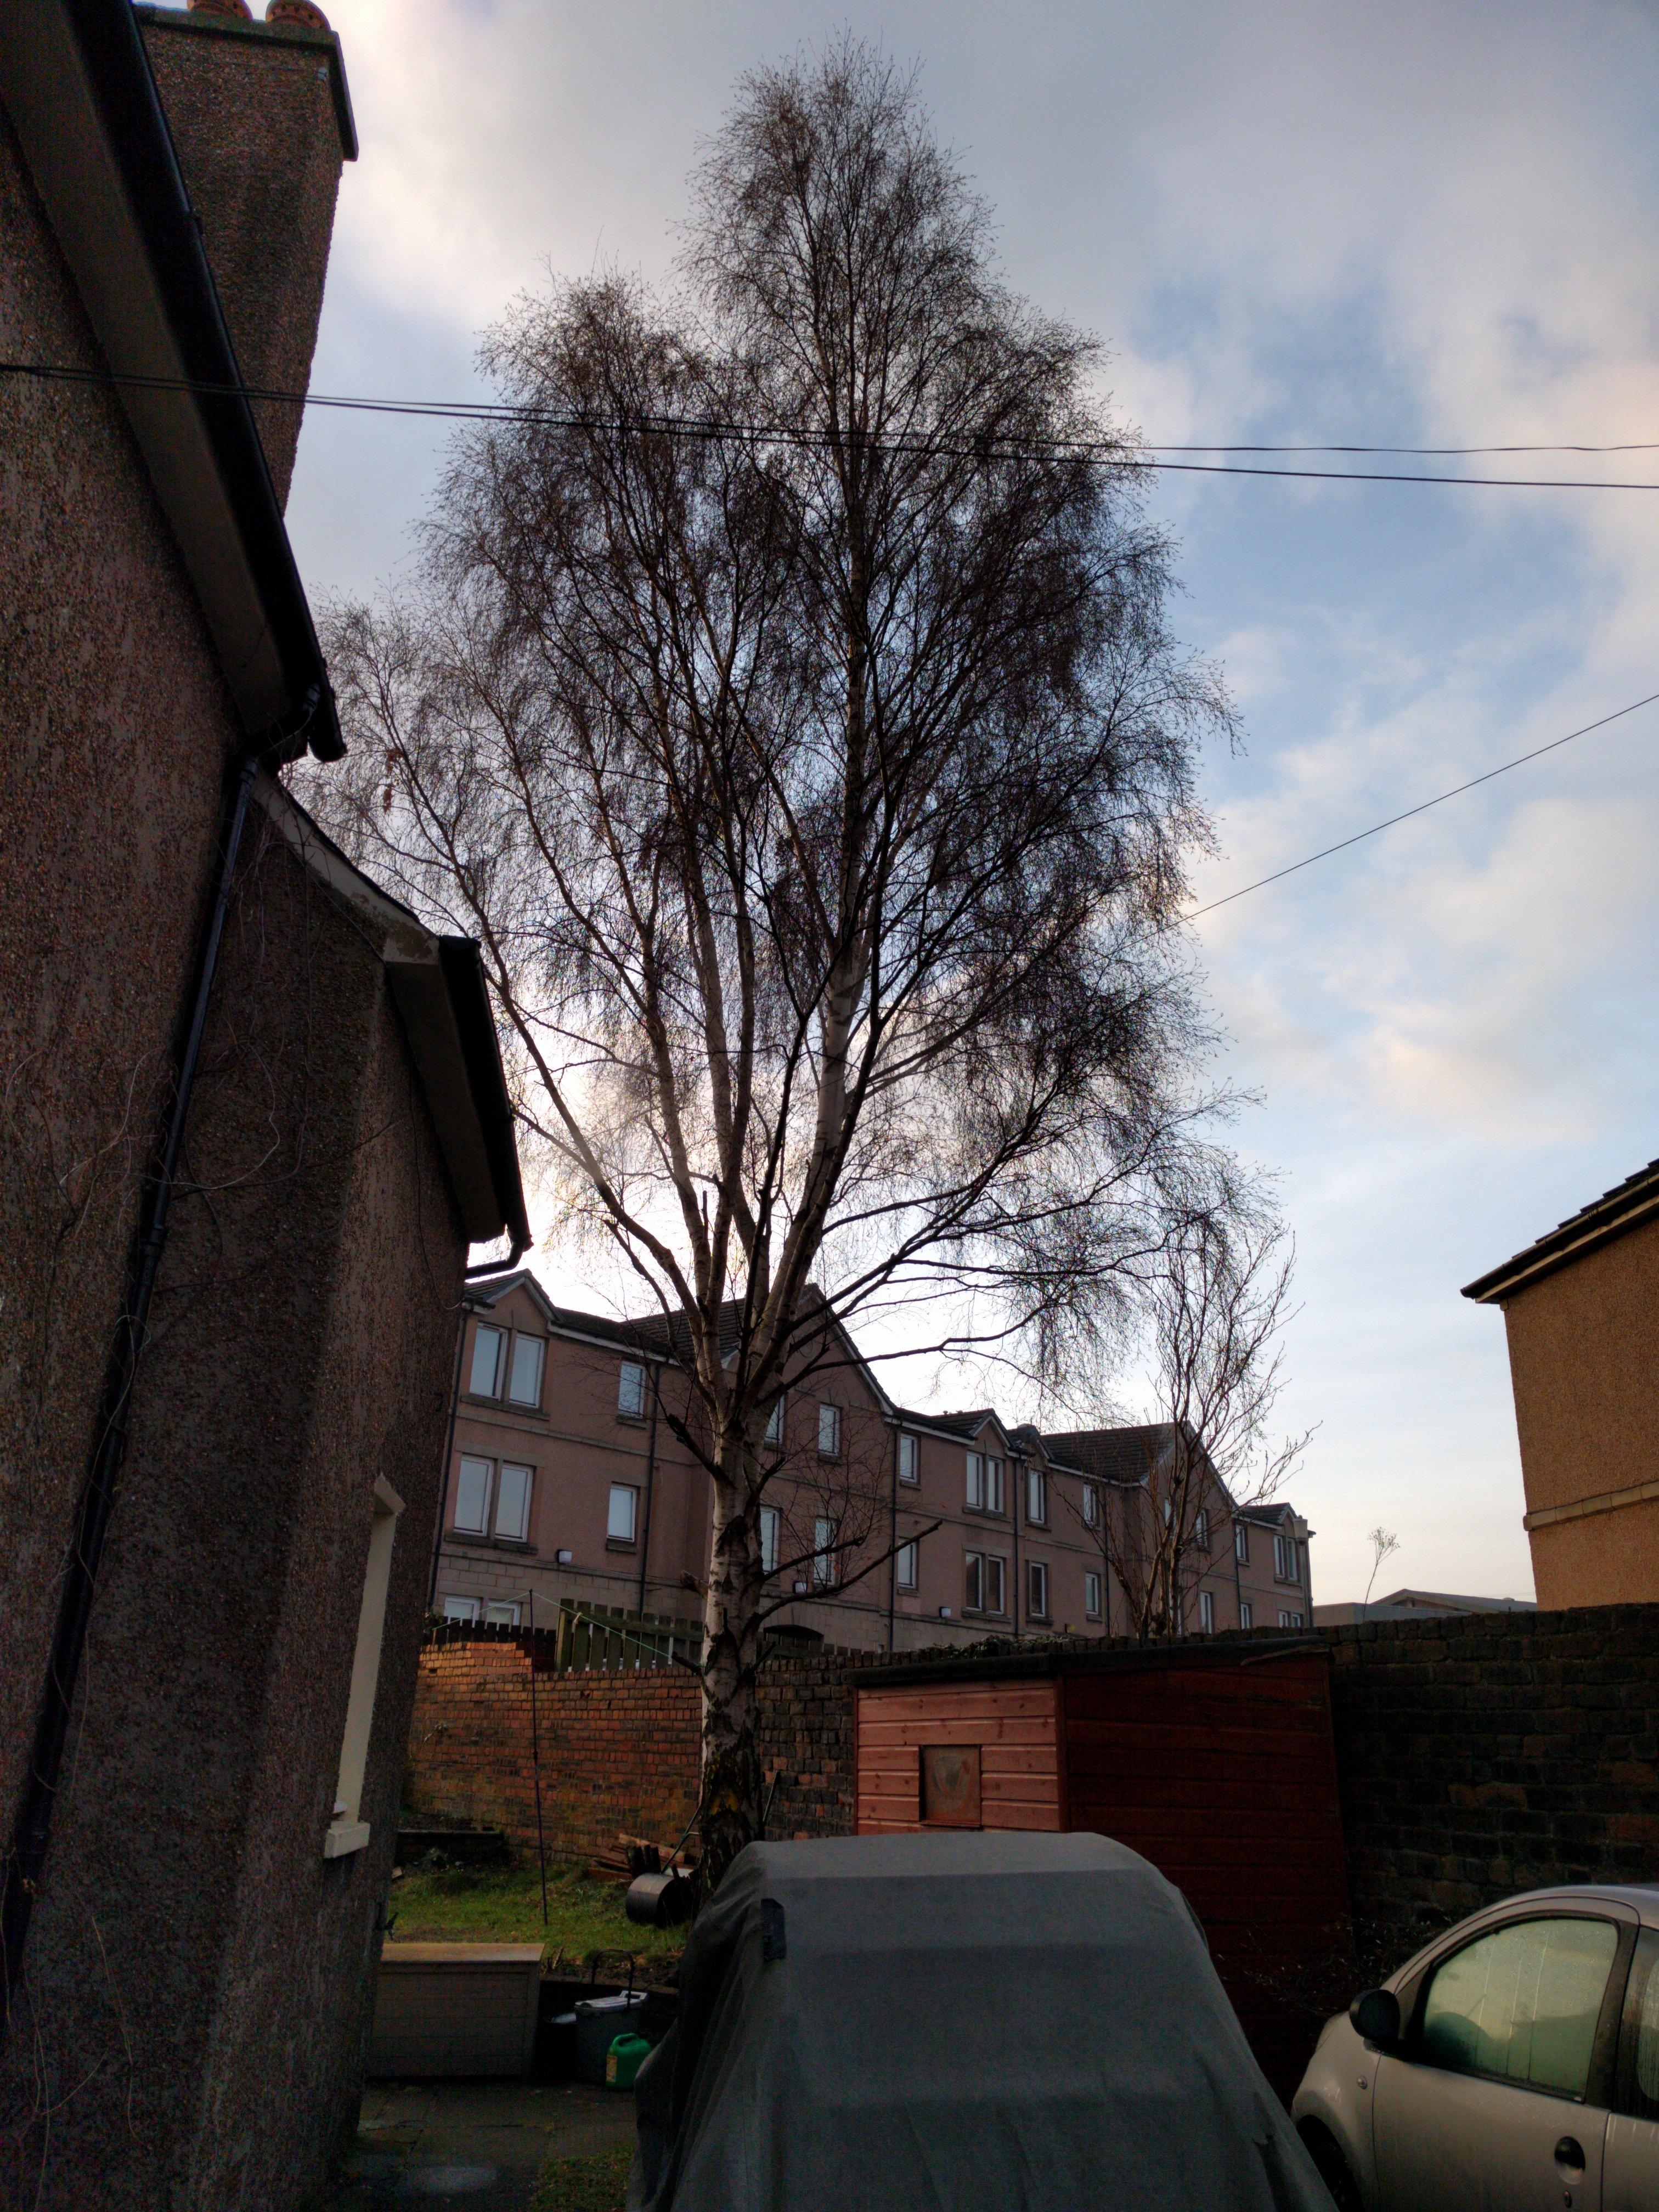
The silver birch tree in the back garden was the tallest tree in the immediate area and it was quite nice to be able to see when coming home on the train. However, it was also right next to the house so to reduce the risk of roots getting into the foundations or branches damaging the roof it needed to be cut back.
It’s a bit more of a reduction than was planned but it was dictated by the growing points of the tree. The leader has now been taken back down below the level of the rest of the crown so as it regrows it should broaden out rather than head straight upwards again.
The day before it was cut I made a point of climbing it, as a boy I knew all the routes up the tree at the bottom of our garden so I owed it to my younger self to make my way up this one. It was fairly easy and the view from the top was well worth it.
At this point I’m standing about where the new top of the tree is.
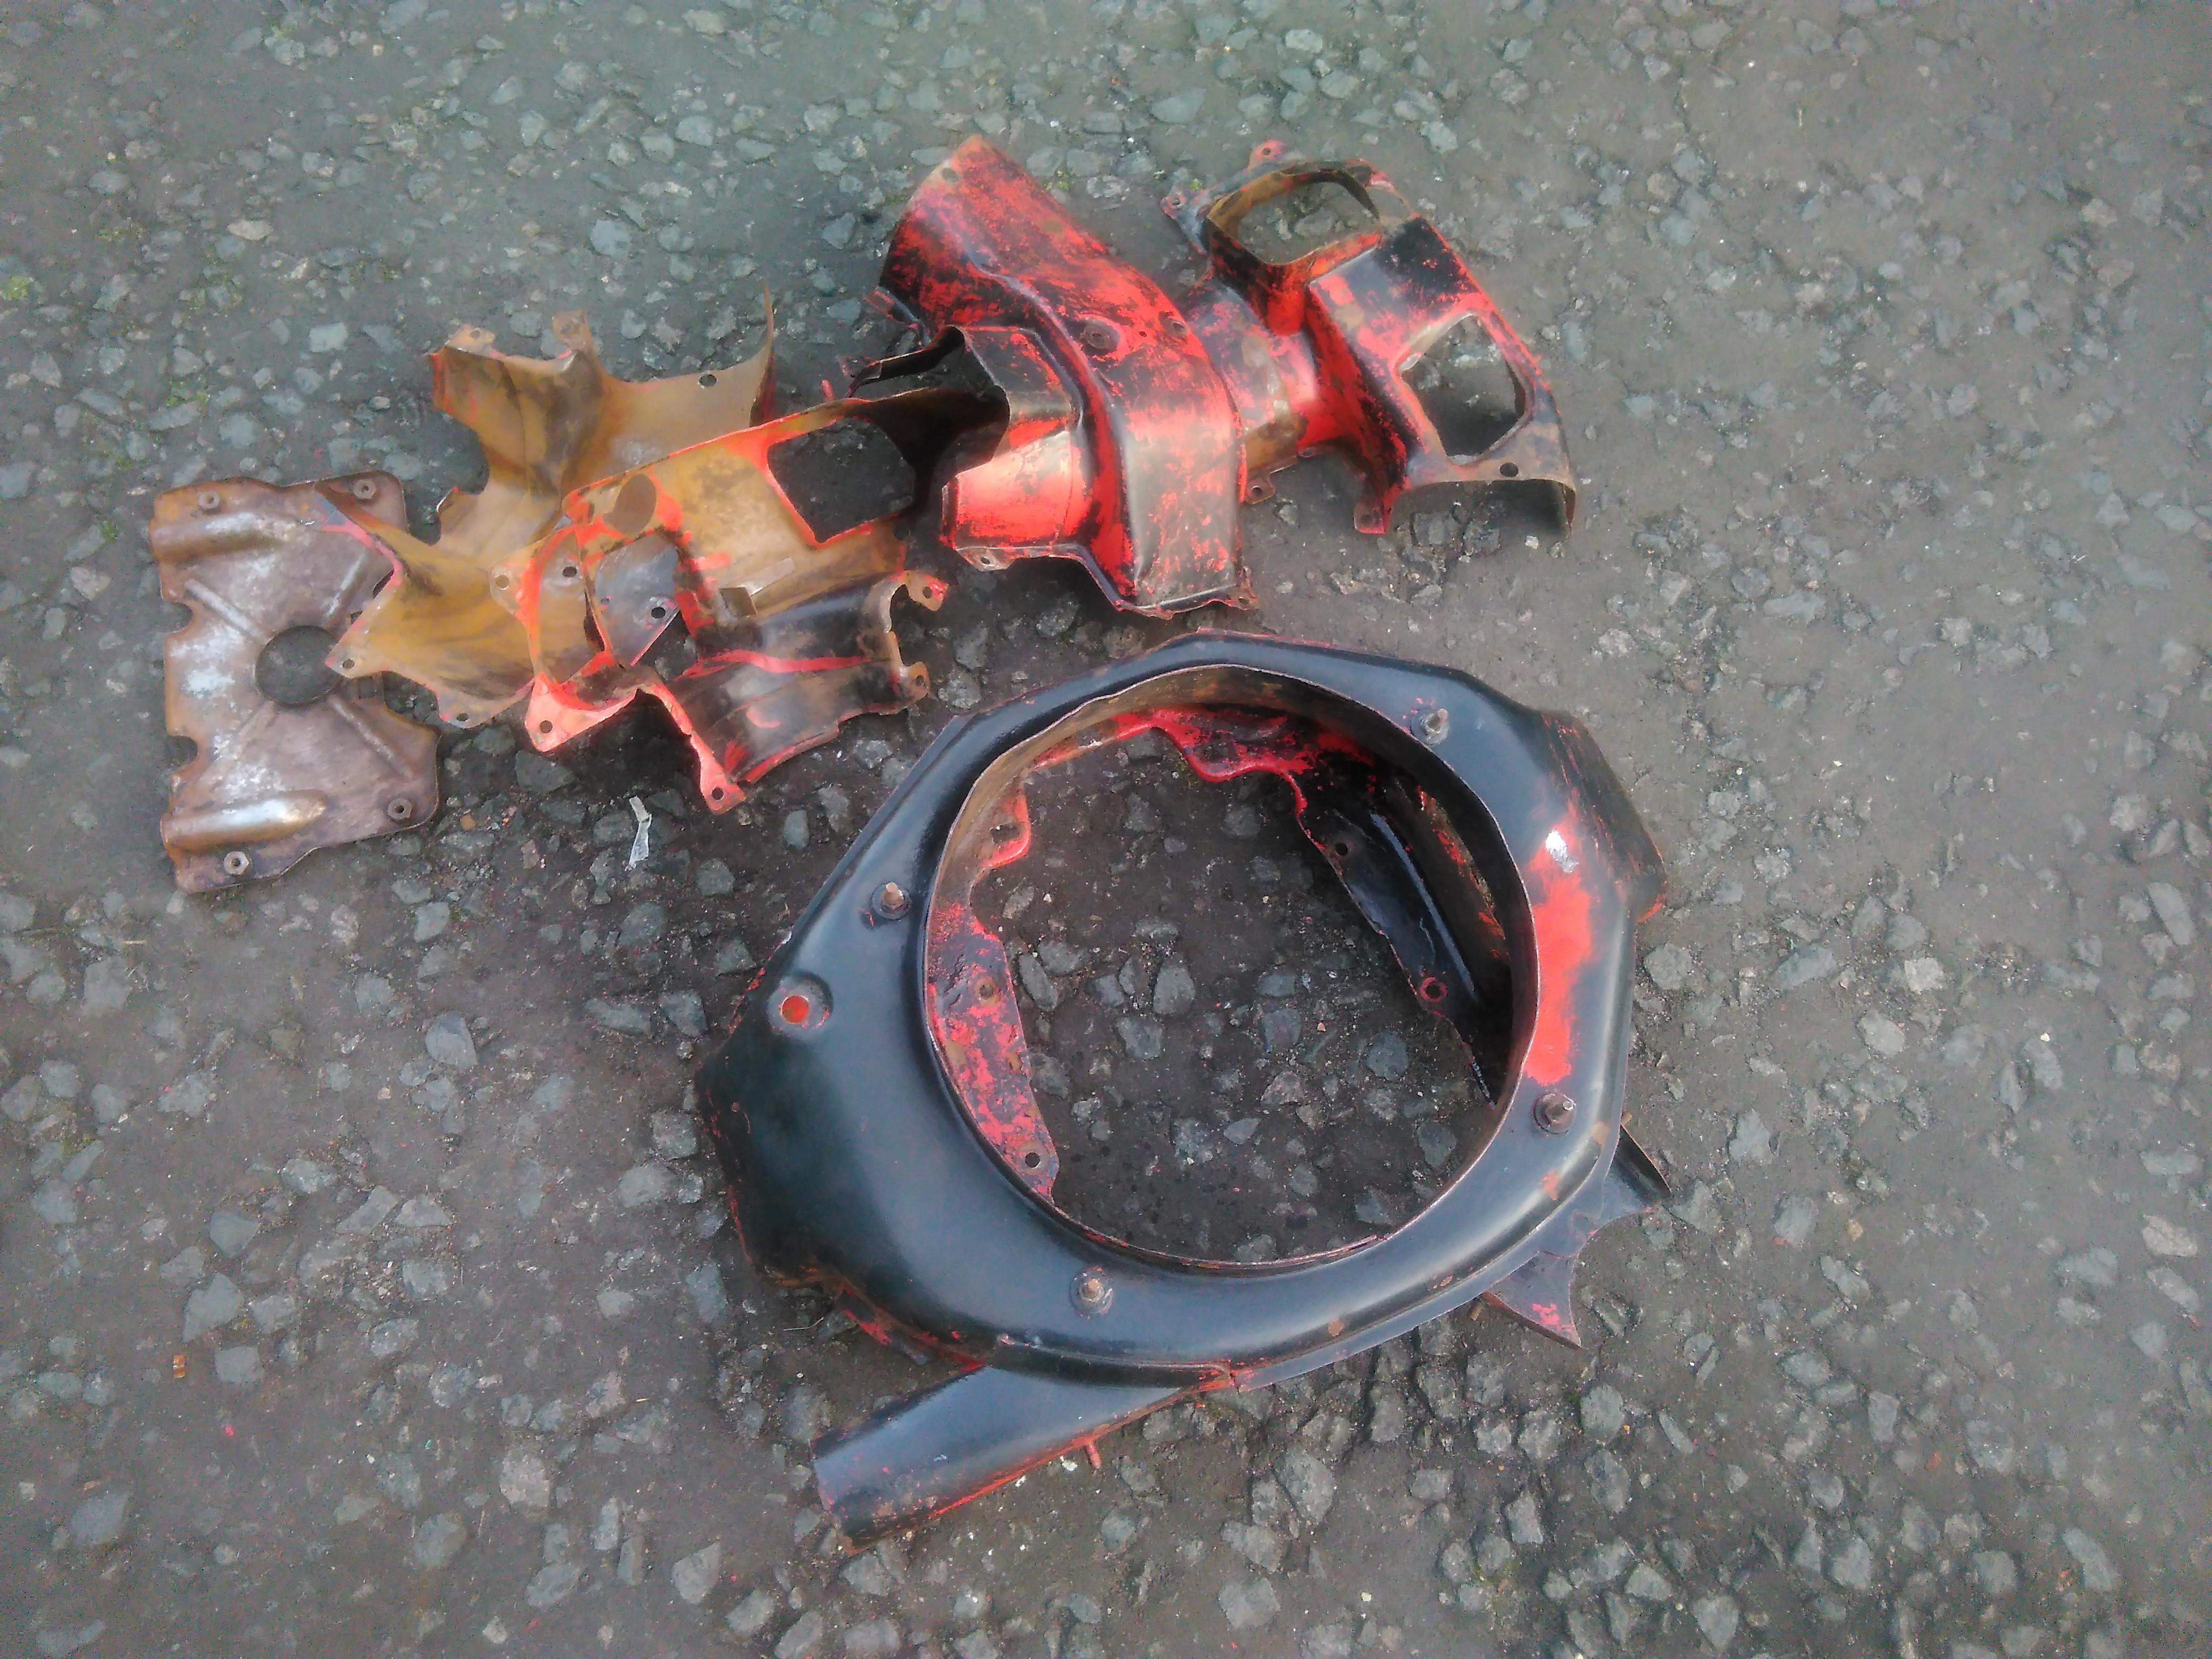
After the initial de-clarting of the tinware I now moved on to trying to clean them up further. However, after the best part of a day (or what passes for daylight hours at this time of year) with various abrasives and power tools I’d not made much more than an impact on the surface.
As this has now sucked more than enough of my time I’ve opted to pay to have them sand blasted.
In the mean time I’ve picked up a new set of fixings to hold it all together when it’s done.
Coming out of Gilsland there is a section of Hadrian’s Wall that was built as “narrow wall” (eight Roman feet wide) on top of “broad wall” (ten Roman feet wide). As the narrow wall is later in date, this indicates that the foundations were built first and the main wall was built afterwards.
Further on there is a milecastle.
The wings of the milecastle that join into the wall are also built as broad wall and are stepped in to meet the inner face of the narrow wall. This indicates that the mile castles were built independently and before the main wall.
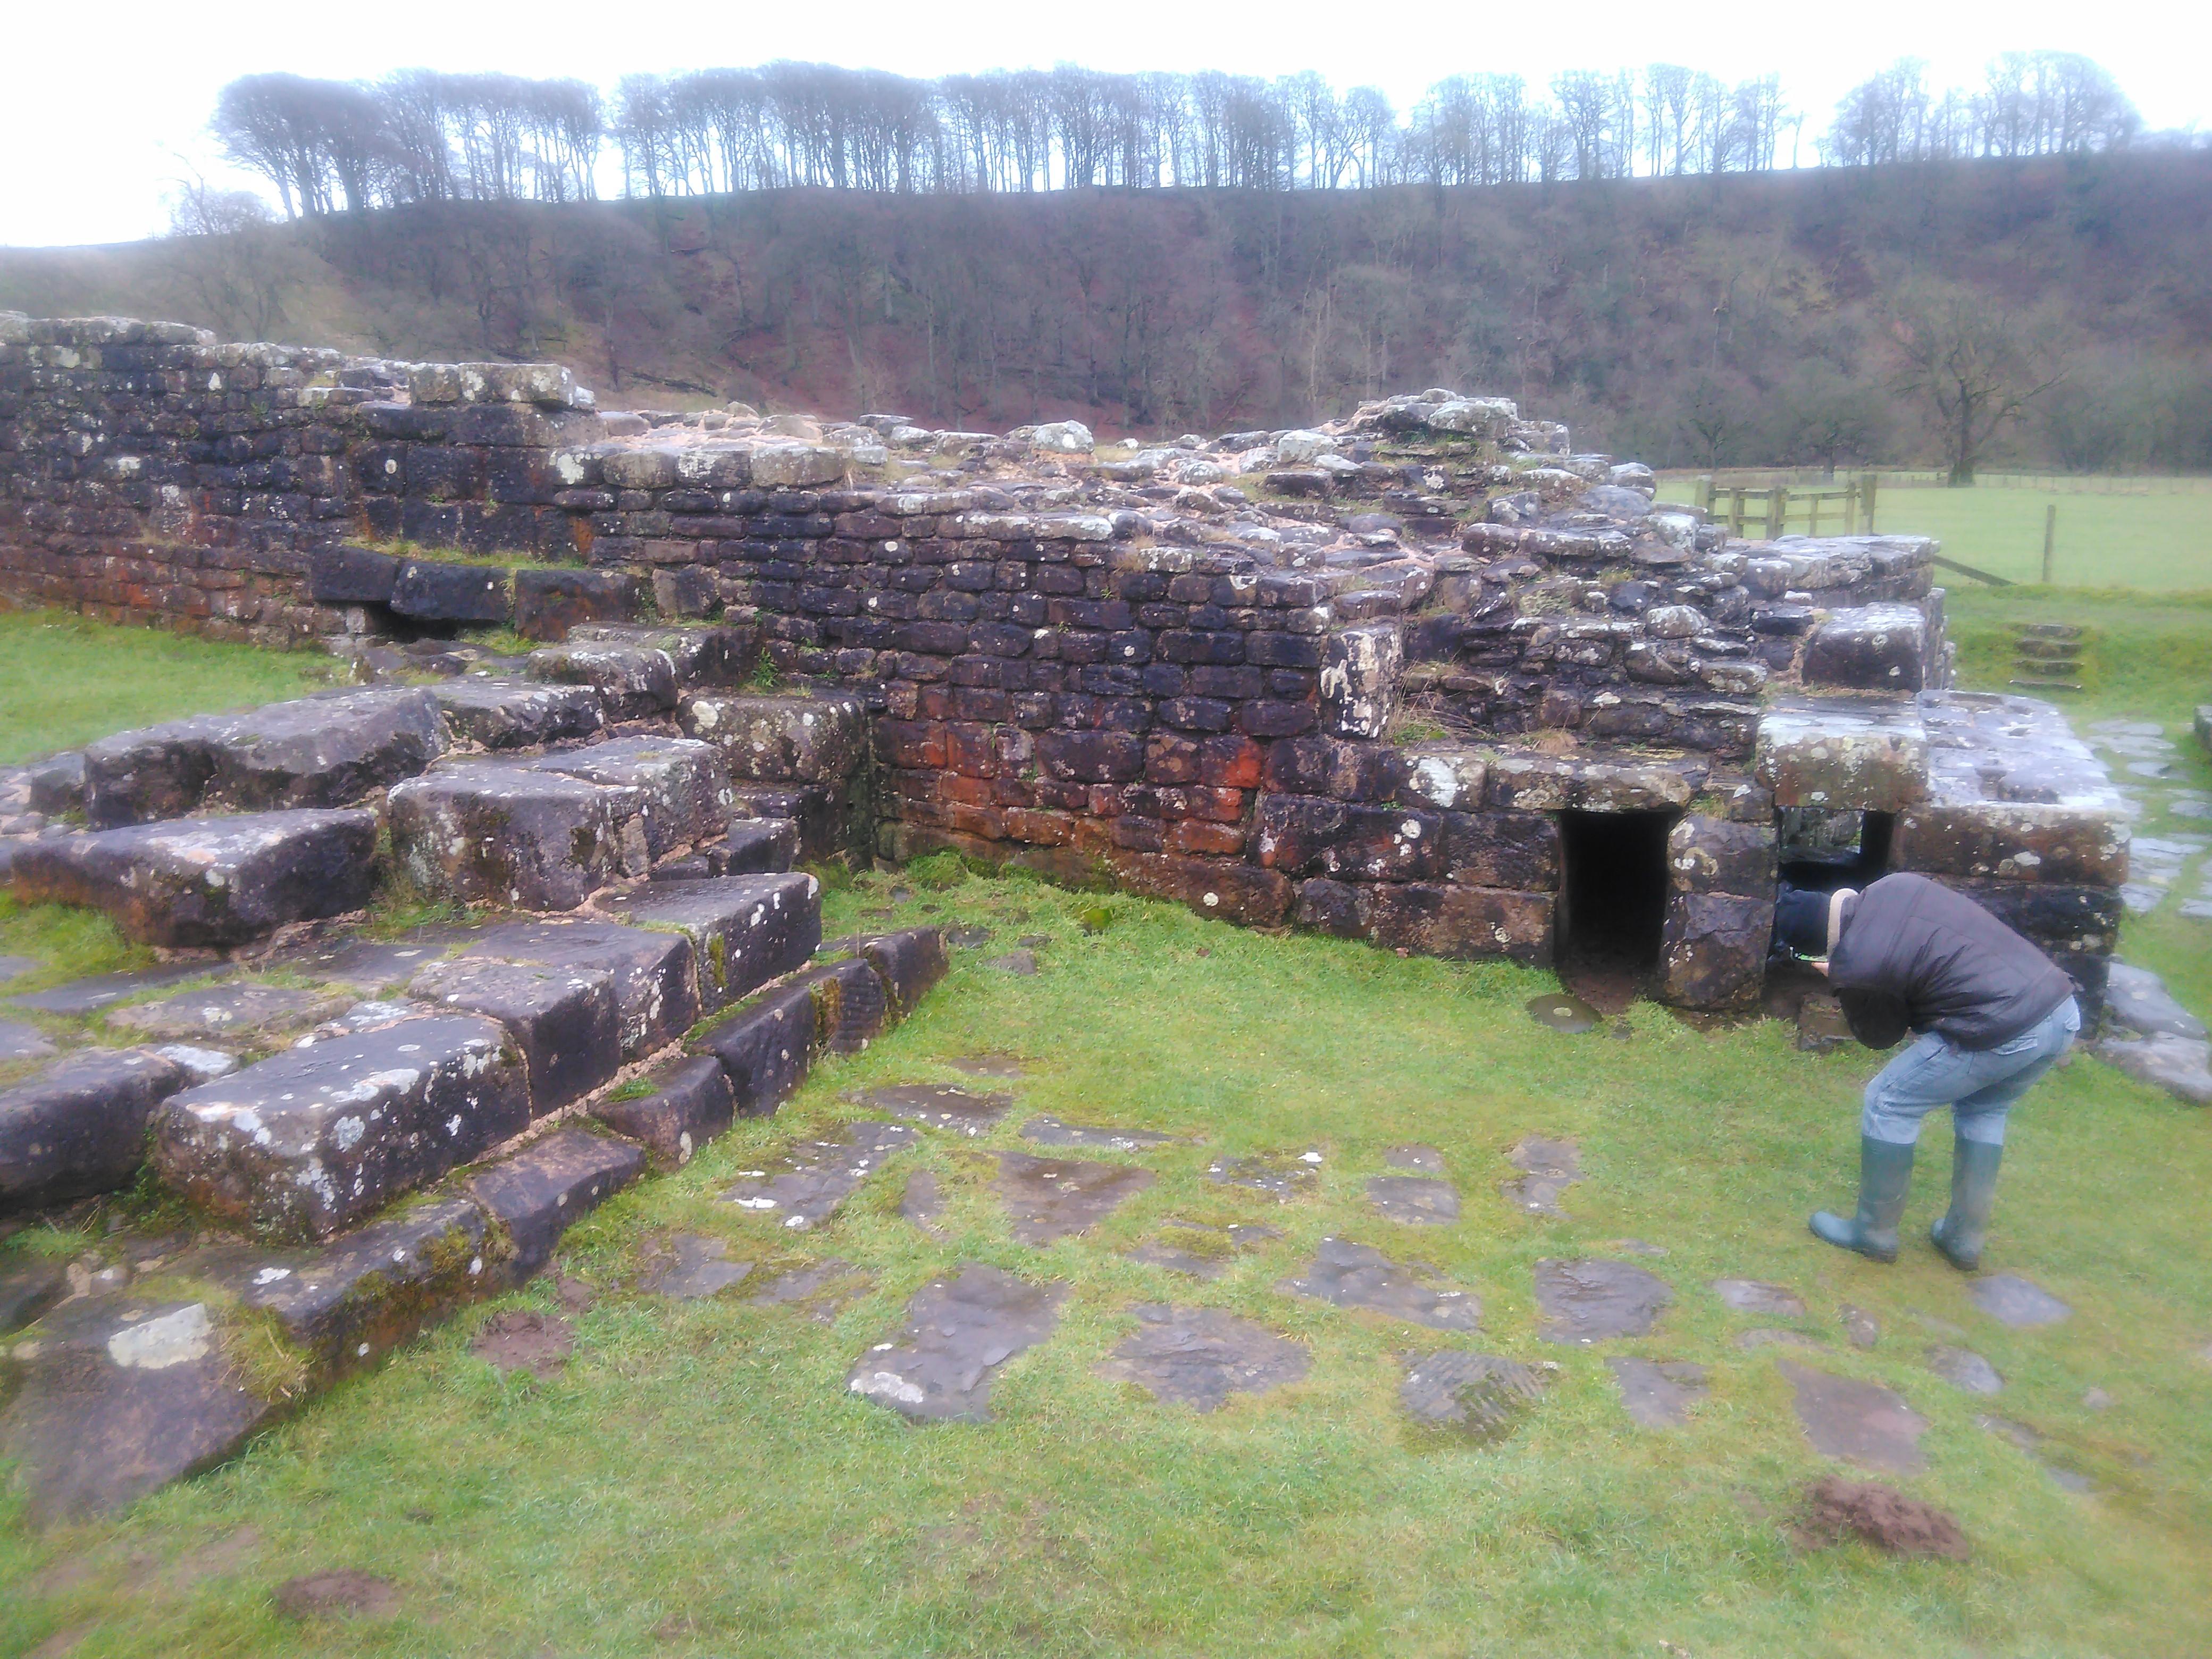
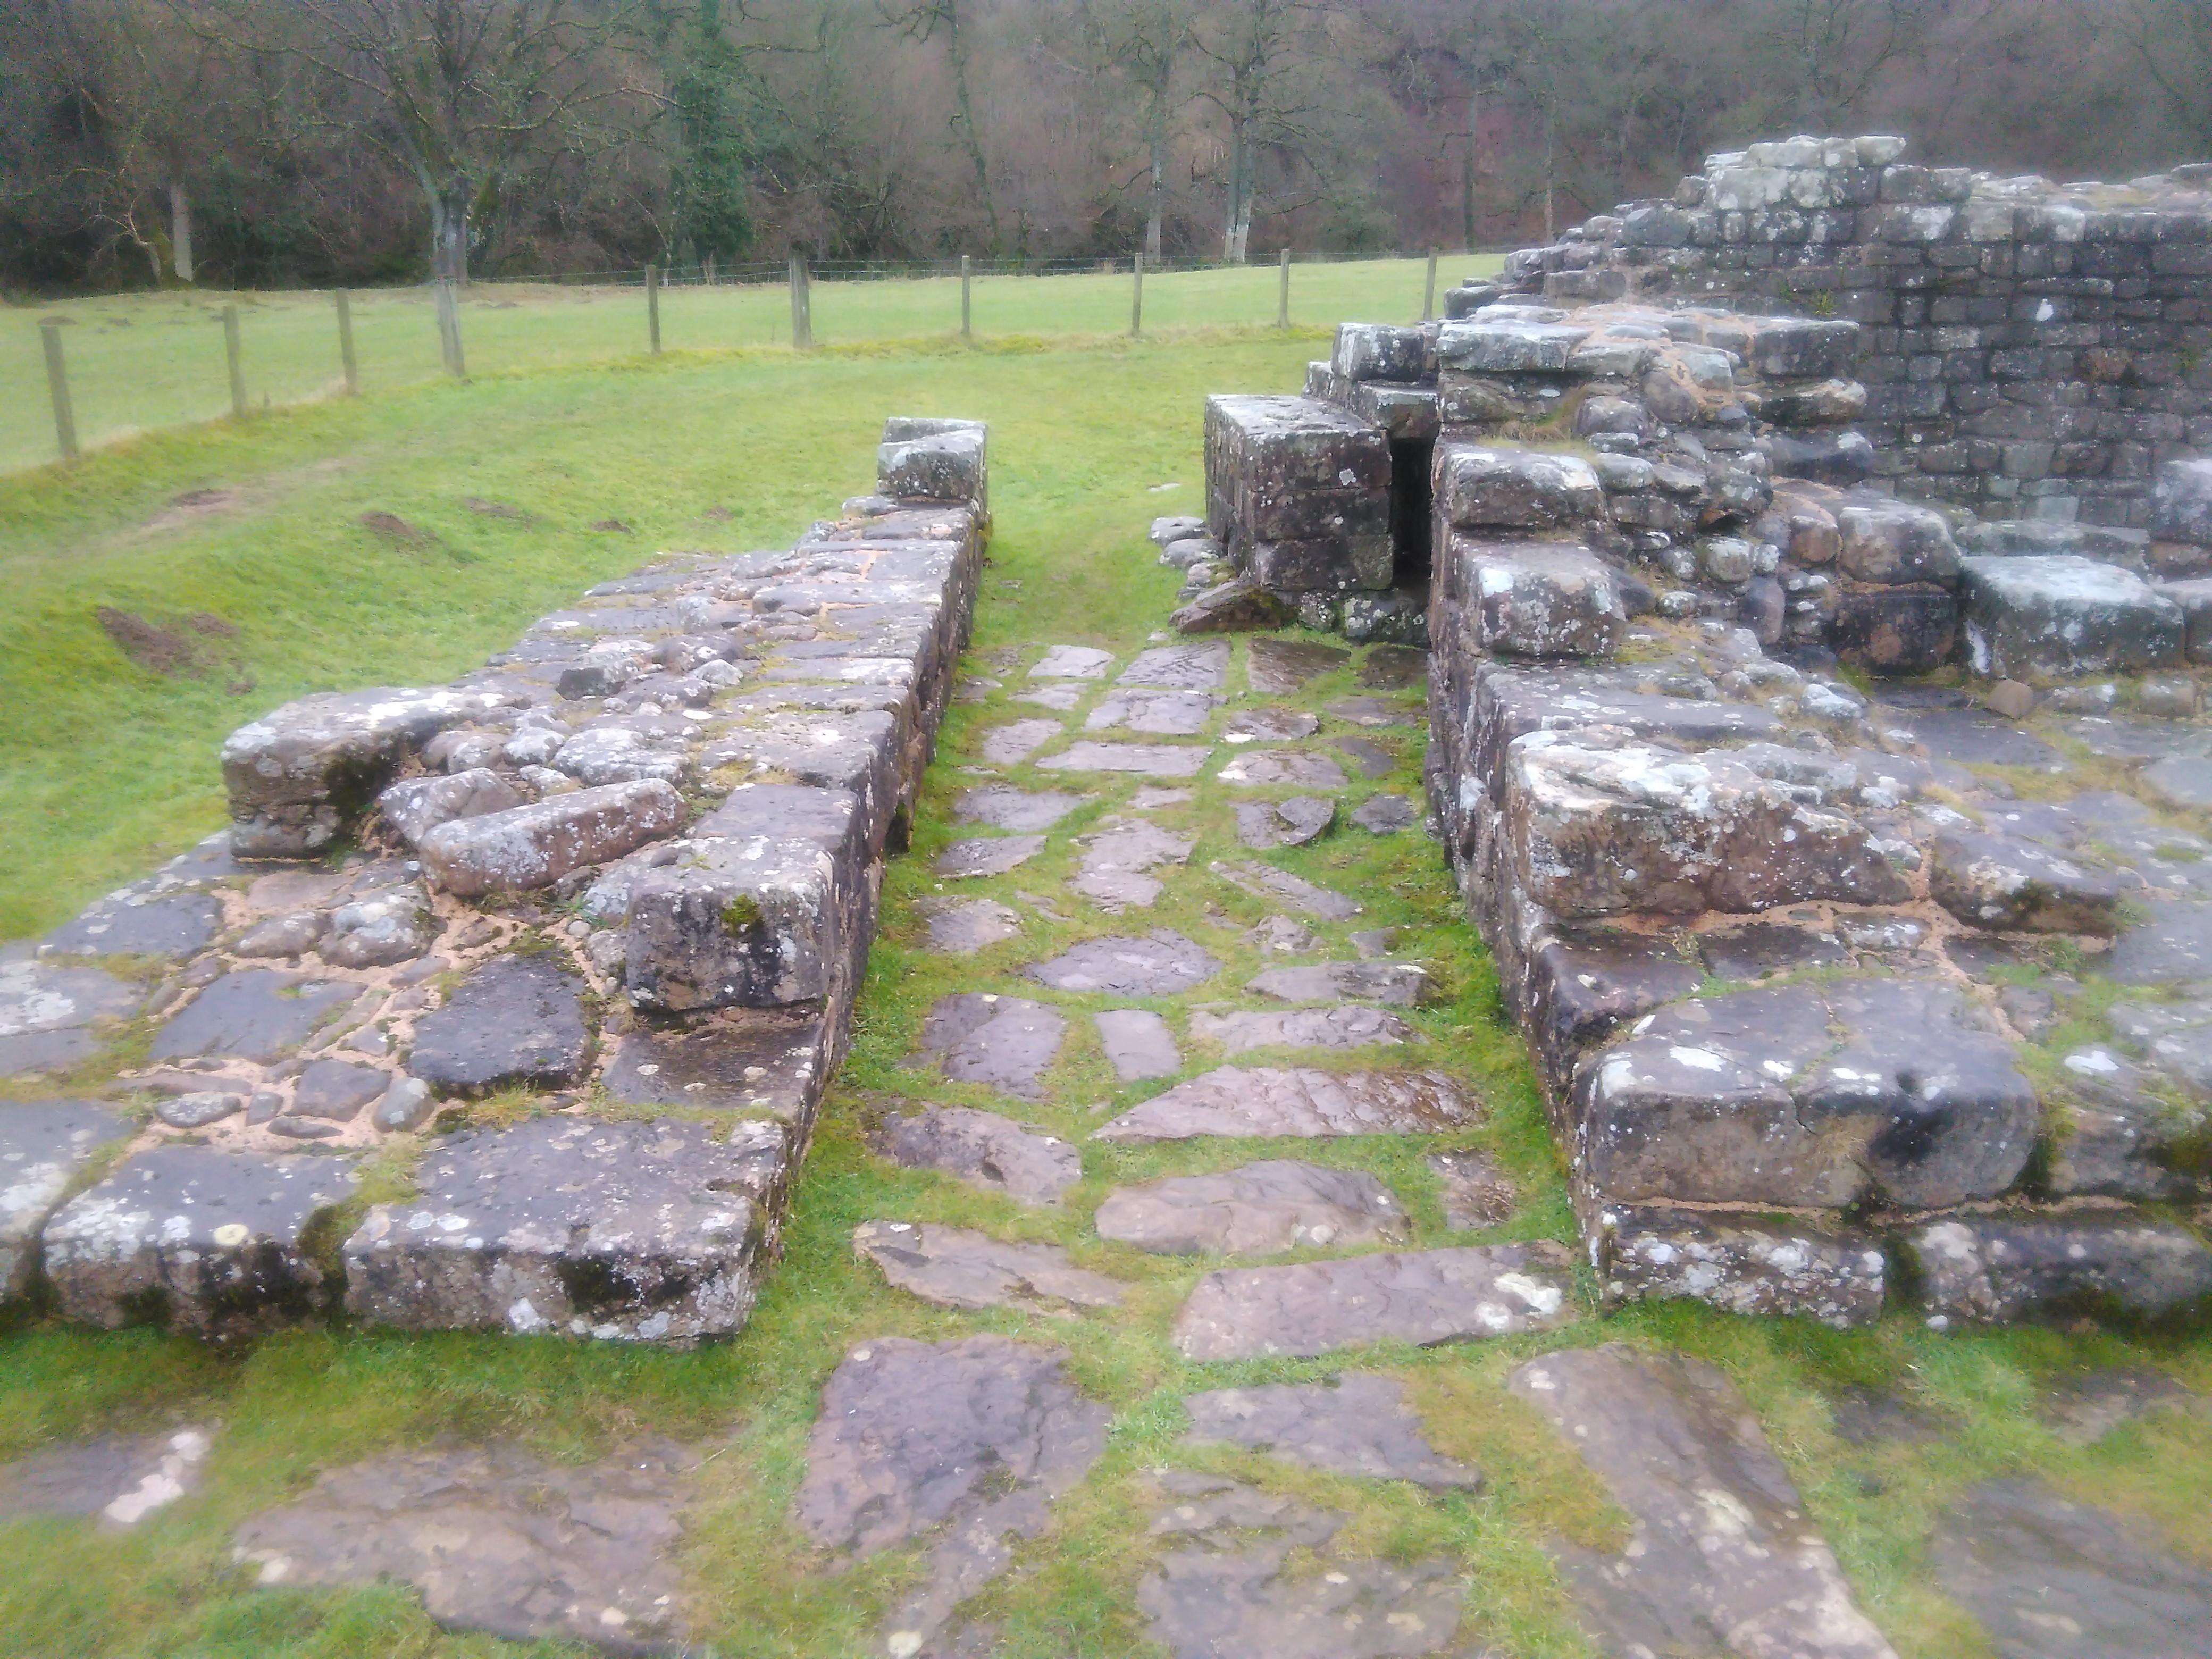
Further down there is the remains of a bridge abutment. This was significantly modified twice throughout its life as it was presumably damaged by by the river. To relieve pressure on the structure sluices were put into the wall on the first rebuilding.
As these seemingly didn’t prove sufficient they were widened when it was modified for the second time.
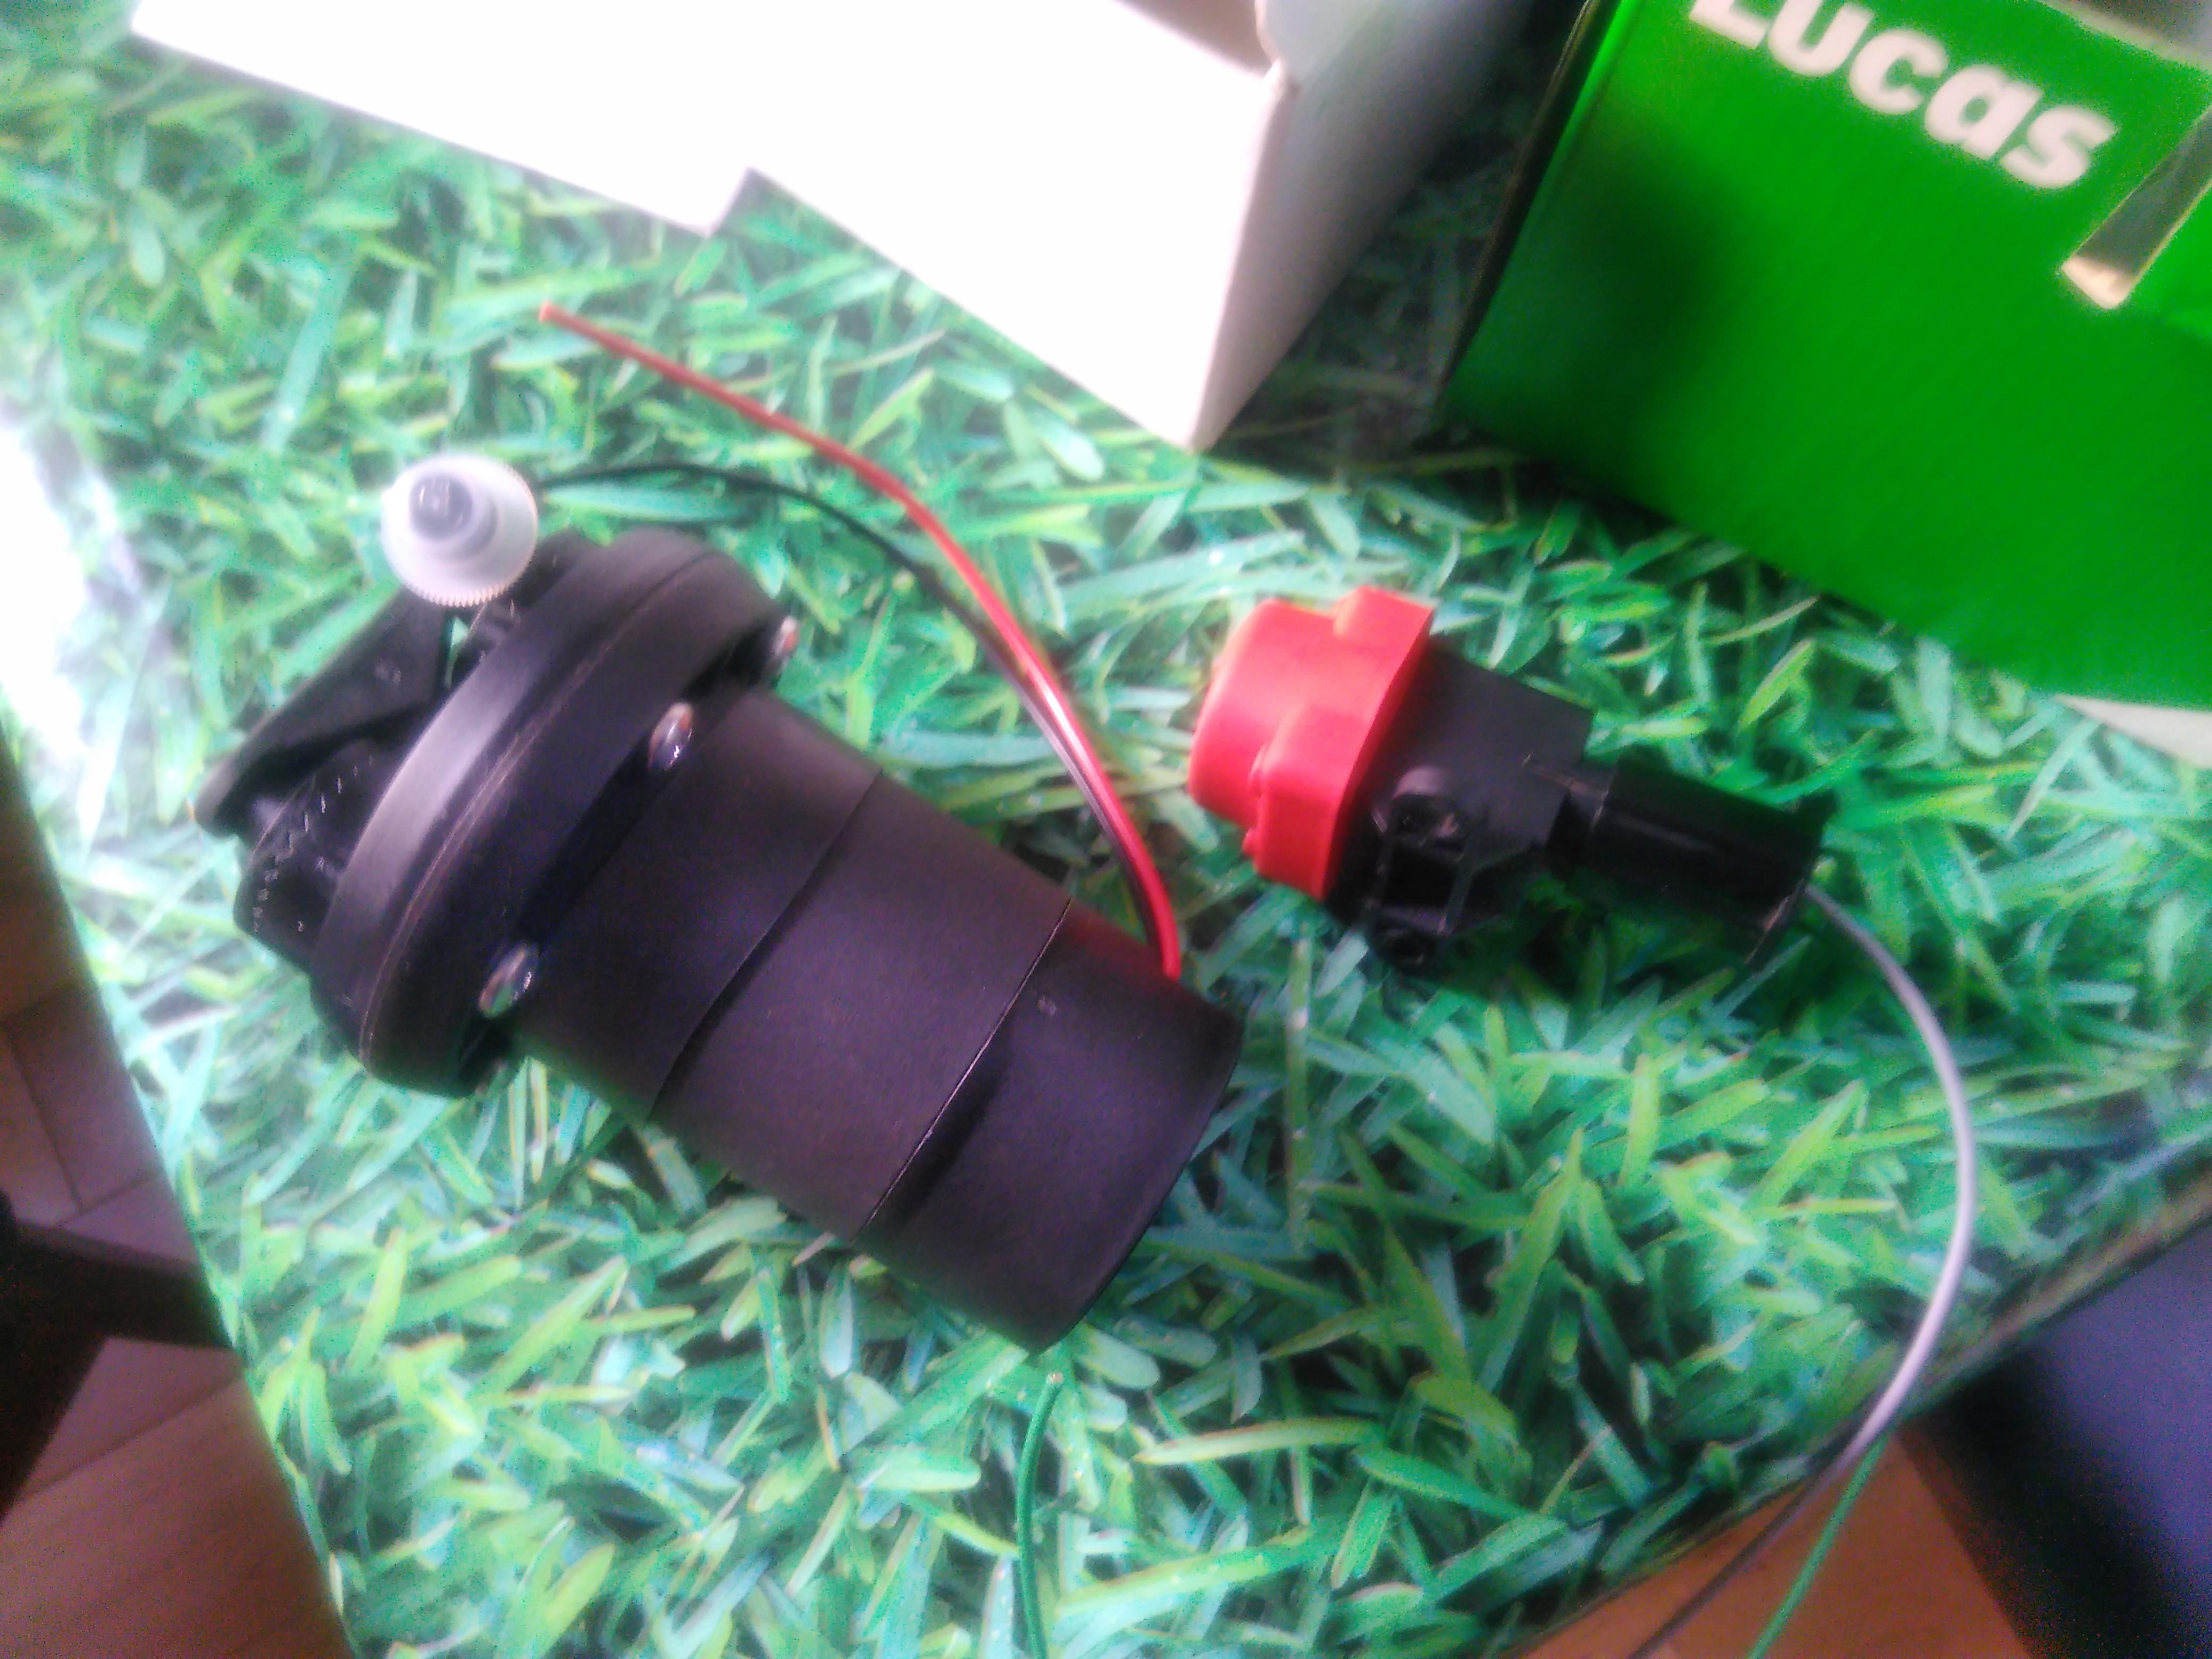
As I’d blanked off the mechanical fuel pump mounting I needed an electric fuel pump. This came in the form of a Hucco 133010 engine mounted (suction) pump that can deliver the 2.6-2.9 psi specified in the Citroen Workshop Manual for the fuel system.
For safety I have also got an inertia cut-out that will isolate the fuel pump in the event of an impact to minimise the risk of fuel being pumped out of a split or disconnected fuel line in the engine bay.